“And when you crush an apple with your teeth, say to it in your heart:
Your seeds shall live in my body,
And the buds of your tomorrow shall blossom in my heart,
And your fragrance shall be my breath,
And together we shall rejoice through all the seasons.”
~ Kahlil Gibran
Beautiful…
So by the time we get to Valentine’s Day, the sweet little apple is still coming down from its big show in the fall. With flannel pj’s, hot cocoa, favorite books, and remote in hand, it’s ready to brave the winter from a quiet cozy sleepy spot.
Until today.
I am waking this sleepy little babe for the purpose of Valentine’s Day – to show it – and the world – that it can be just as popular as the chocolate covered strawberry and sweet raspberries prepared every which way.
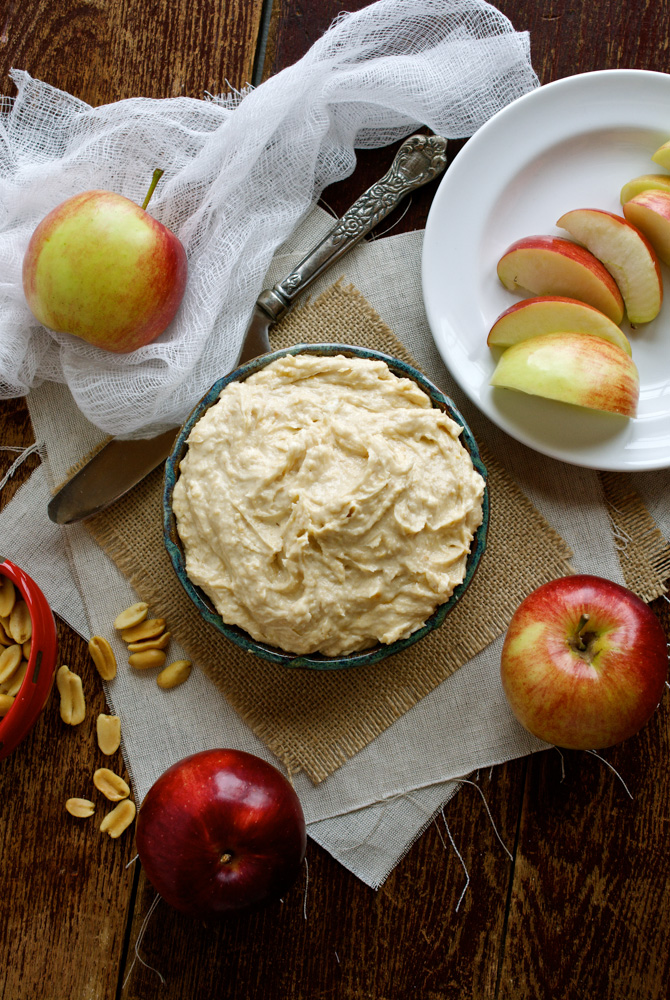
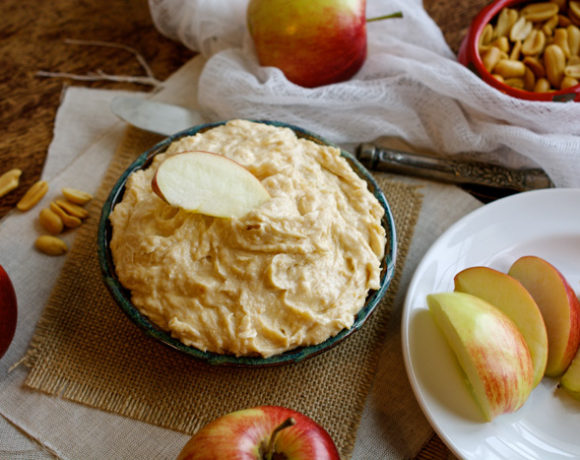
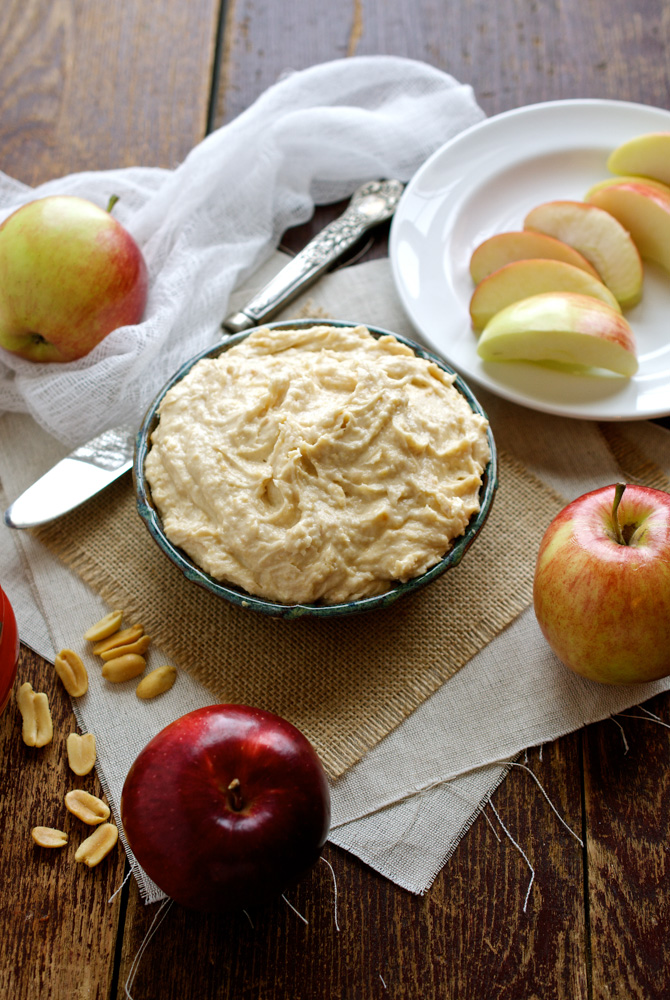
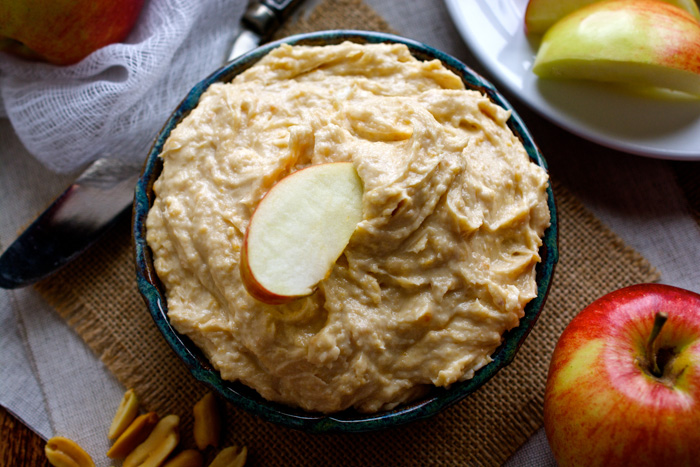
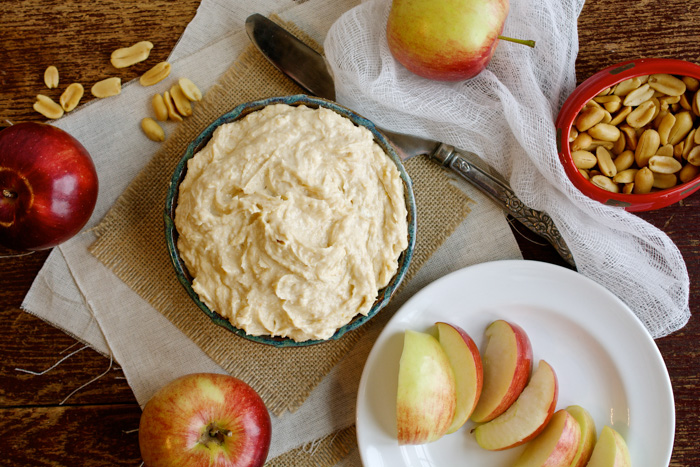
Today the apple will join its rougey-colored compadres and share its spotlight with Nutty Apple Dip.
While reading the newspaper a few weeks ago, I stumbled upon a fun little recipe called Applepalooza by Adam Harvey. Luckily, I stored the idea for it in the back of my head because as I was planning for Valentine’s Day, it came flooding forward. So happy it did!
If you’re anything like I am – you love peanut butter – crunchy peanut butter, and this dip takes us there. Actually, beyond there. It takes us to a whole new level of peanut-ty goodness with an extra special flavor boost derived from brown sugar, honey, vanilla and cream cheese. I’ve modified the ingredients slightly, going for a more peanut-ty flavor than the original.
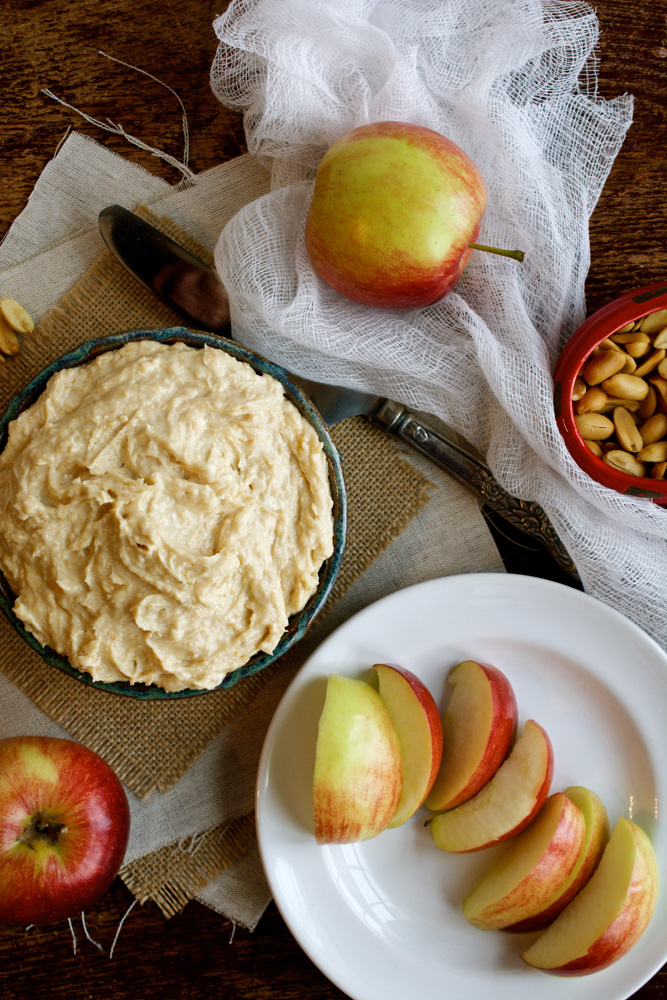
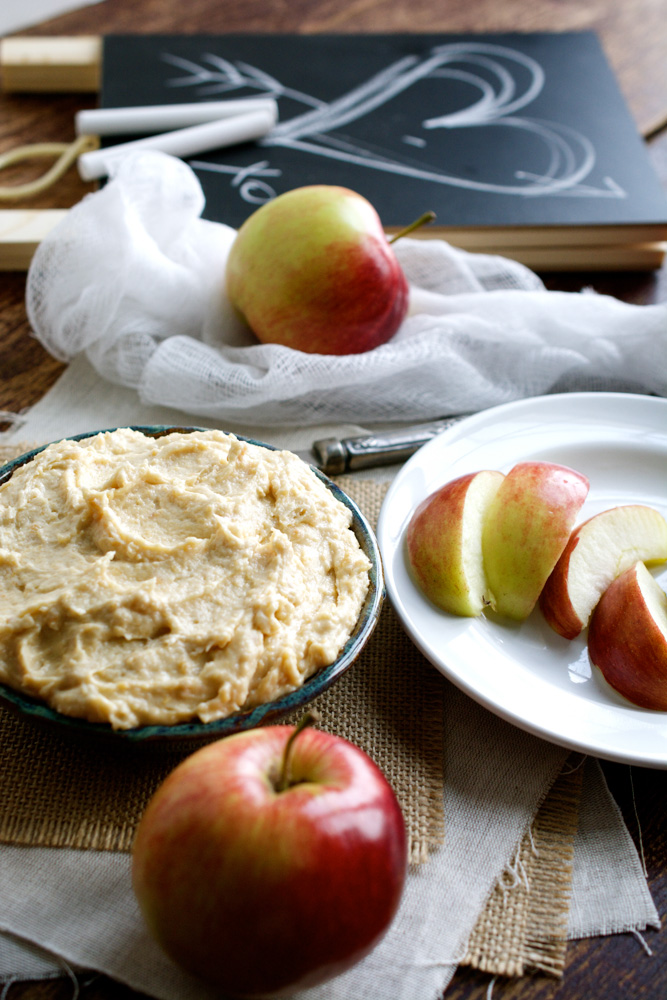
This is a great little recipe to have on hand as it’s as simple as delivering everything to a food processor, except the apples, and whirring up a yummy treat that will make everyone happy.
And isn’t that what this day is all about?
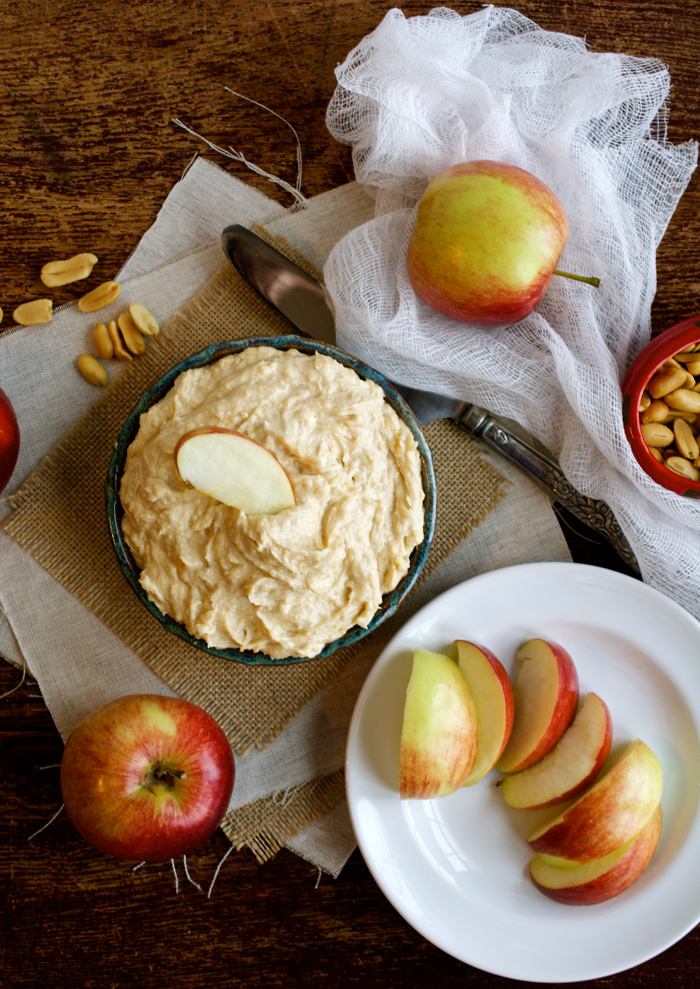
Sweet and crunchy with savory undertones…this is a dip made for sharing.
Buon Appetito!
Print
Nutty Apple Dip
- Category: Dessert
Ingredients
- 1 cup cream cheese, softened
- 1/3 cup light brown sugar
- 2 Tbsp. vanilla
- 2 – 3 ounces chopped dry roasted peanuts
- 1 Tbsp. honey
- 2 lbs. sliced apples
Instructions
- Purée the first five items in a food processor until completely combined.
- Place in a serving bowl.
- Core apples and cut into wedges.
- Serve dip with sliced apples.
Ciao!
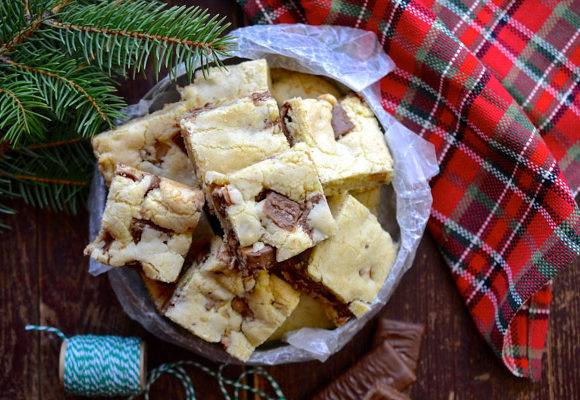
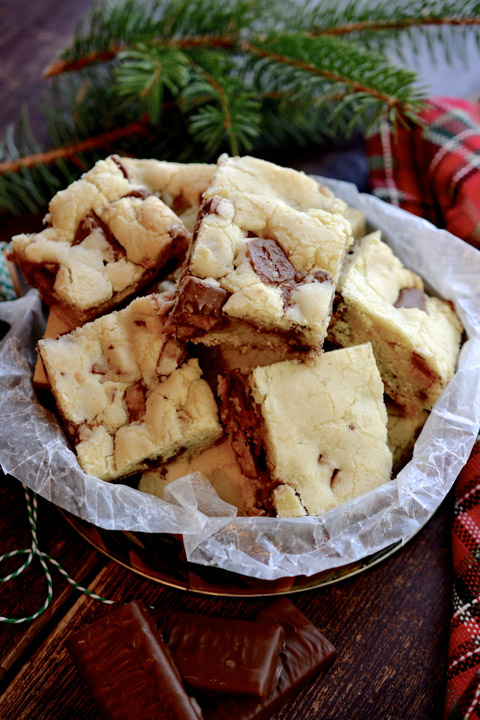
Candy Bar Bars

This recipe comes from one of my very favorite cookbooks. I suppose I could call it my Velveteen Rabbit of cookbooks…
Every year at Christmastime, for the last 15 years or so, I bring it out and dress it up with splashes of batter and pencil markings to add to its already tattered and torn pages. If this book becomes any more “Real” I fear it will ask for a good scrubbing.
Like the Velveteen Rabbit who was loved into Realness, this book makes real, beautiful memories that rush back each and every time I grab for the book. From Monster Cookies that were lunchbox favorites and Coconut Macaroons on Mother’s Day to our favorite Snickerdoodles that Luc has mastered and can bake to a perfect puff that I can never quite achieve…this book has contributed to family fun and celebration over and over, again.

So it makes perfect sense that I would include a new holiday favorite from Joy of Cooking Christmas Cookies, here.
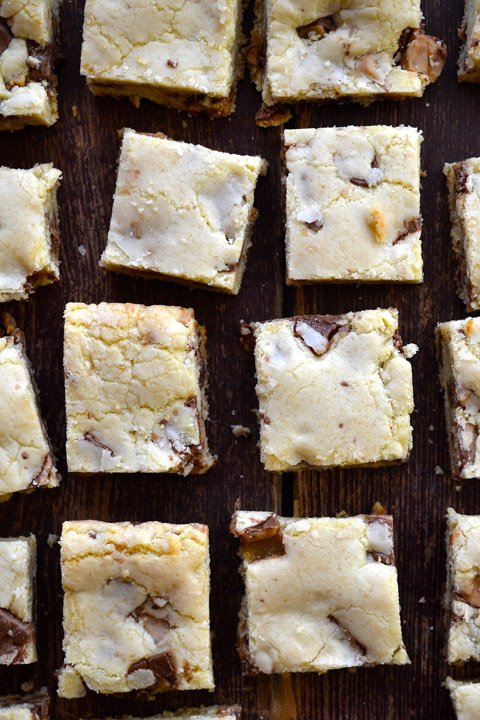
Helloooo, Heath.
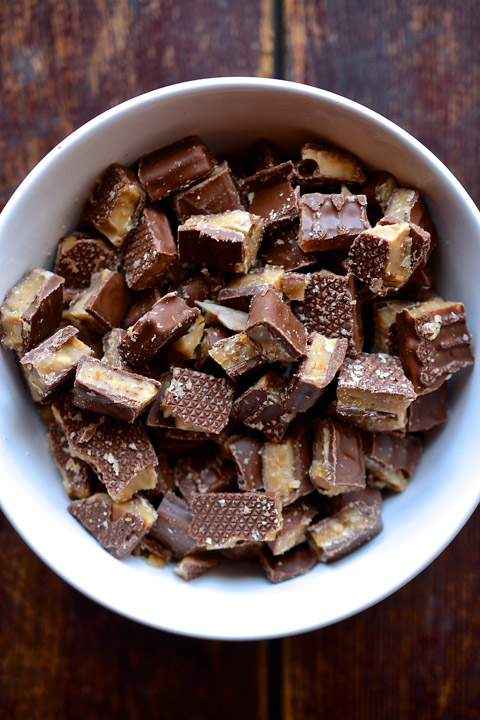
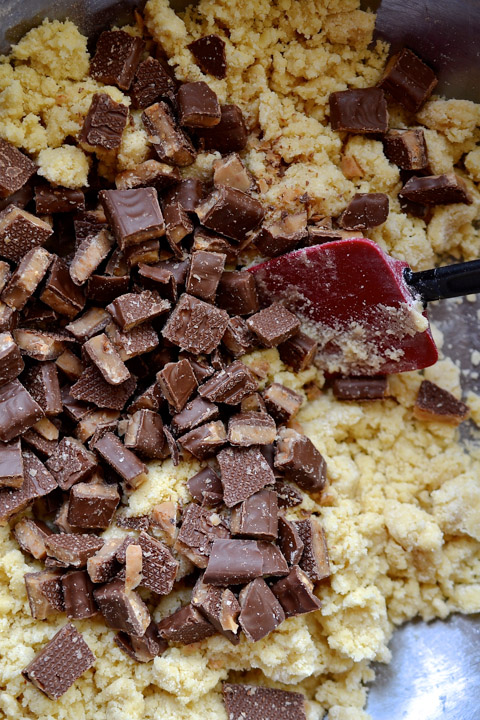
I knew when I decided to make this bar, I would use a crunchy toffee bar. You can incorporate just about any candy bar, but this just so happens to be a favorite of mine and the toffee helps to create an awesome texture. It doesn’t lose its crunch in the baking process.
As I was sharing with Hubby that I was making these, he reminded me of how much I loved Heath Bars, crunchy Cheetos and Orange Crush soda, during college. Oh my. There’s a memory for you! 🙂 (Remember – the brain is not fully developed until the age of 25 and we continue to learn throughout our lifespan. )
I don’t eat Cheetos, anymore. Growth.
Now, how did I get from Velveteen Rabbit to brain development?
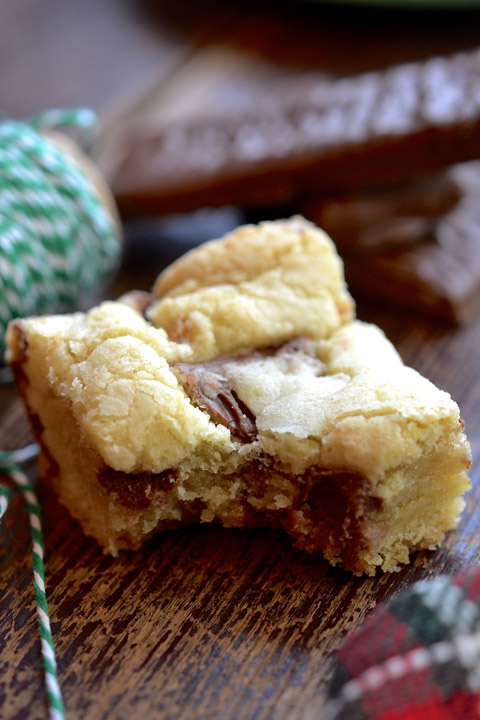
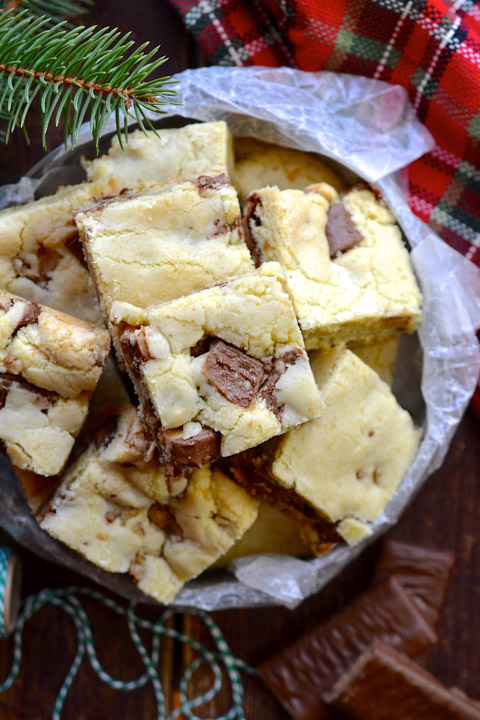
Anywayyyy, these are great…chewy and soft and crunchy and chocolatey all wrapped up in one little bar.
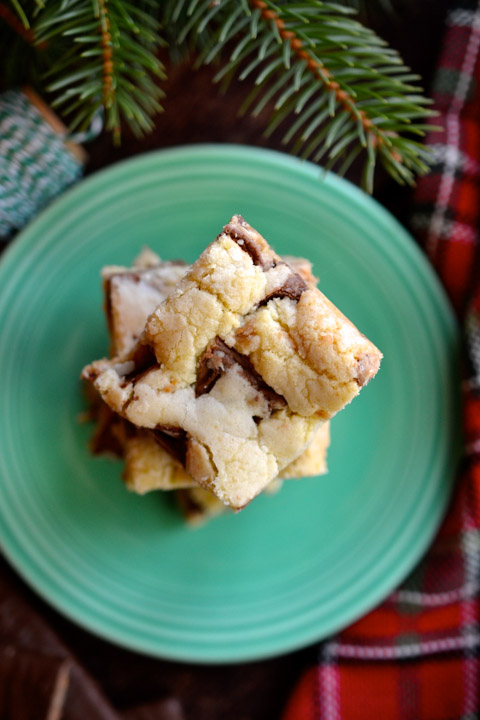
…a nice treat for cookie swaps, foodie gifts or any regular day of the week…
Now go make some memories!
Buon Appetito!
Print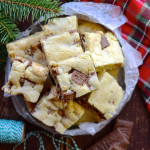
Candy Bar Bars
- Category: Dessert
Description
Candy Bar Bars make the holidays more delicious!!
Ingredients
- 1 cup plus 2 Tbsp. unsalted butter, softened
- 1 1/2 cups sugar
- 2 large eggs, room temperature
- 1 tsp. vanilla extract
- 3 cups all-purpose flour
- 3/4 tsp. baking soda
- 1/4 tsp. salt
- 8 (1.4 oz.) Heath Candy Bars, chopped into 1/2” pieces
Instructions
- Preheat oven to 350 degrees.
- Line a 9×13″ baking pan with aluminum foil, allowing it to overhang the two narrow ends of the pan by 2 inches.
- Coat the foil with nonstick spray.
- In a large bowl, using an electric hand mixer, beat the butter and sugar until smooth.
- Next, beat in the eggs and vanilla.
- Over the butter mixture, sift the flour, baking soda and salt.
- Mix until fully combined. The mixture is on the dryer side.
- Add and stir in the chopped candy.
- Turn out batter into the pan, spreading to the edges.
- Bake on the middle rack for 25 – 30 minutes, until top is firm to the touch and a toothpick comes out slightly wet.
- Transfer the pan to a wire rack and let stand until completely cool.
- Using the overhanging foil as handles, lift the bar to a cutting board.
- Carefully peel off the foil and cut into bars.
Ciao!
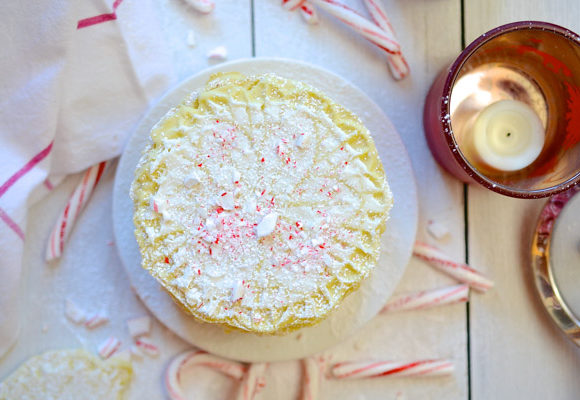
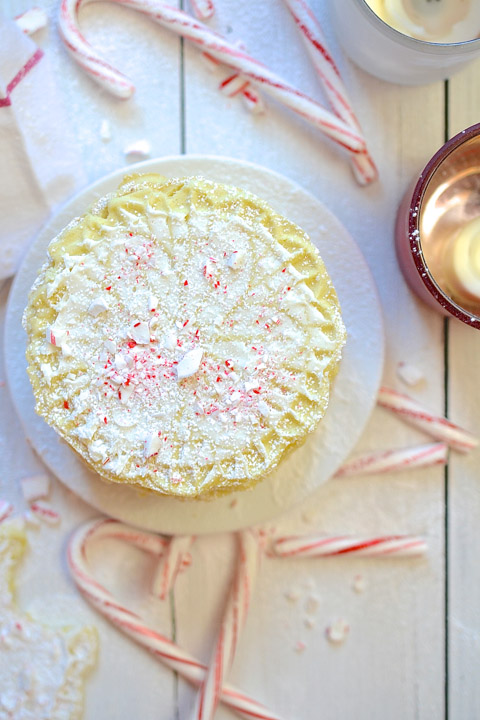
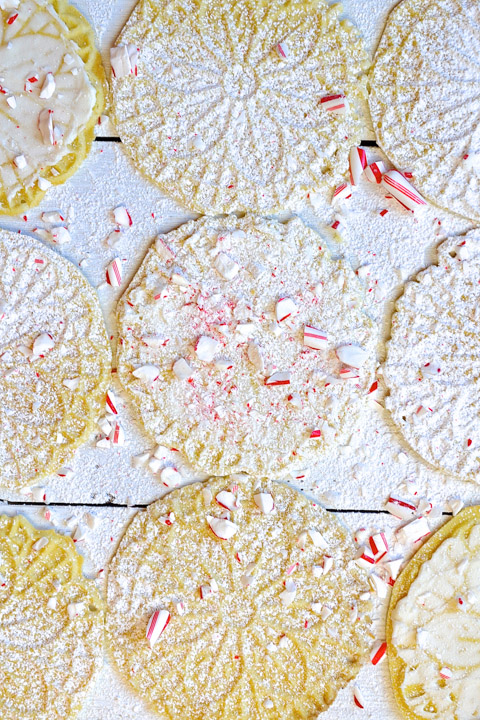
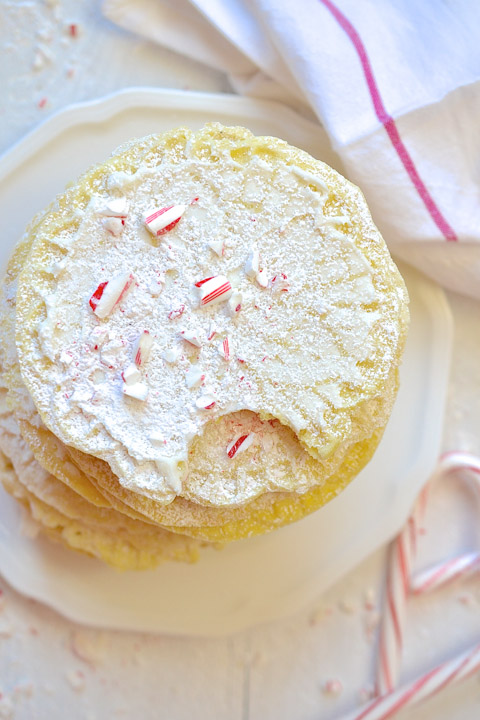
Peppermint Pizzelles with Candy Cane Buttercream
While gathering Christmas decorations from our storage room, I stumbled upon this…
My pizzelle maker!
Happy happy day!!
I thought to myself, what can I do with this? Pizzelles, of course, but I didn’t want it to be just any pizzelle. It needed to be special.
And then it dawned on me…peppermint! I’ve yet to make a peppermint treat, this season…
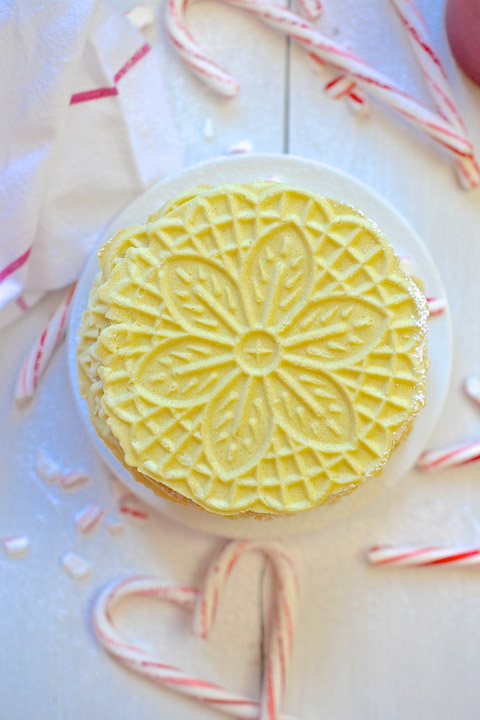
So the wheels started turning and I came up with Peppermint Pizzelles with Candy Cane Buttercream.
Mmm-hmmmm.
It’s been a long time since I’ve made pizzelles.
Which is really quite a shame, given how simple they are.
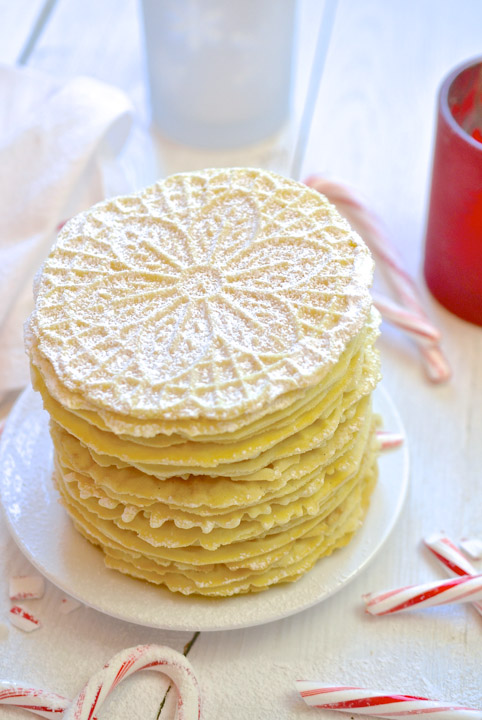
And how easily they adapt to a multitude of fun flavors!
I tell you what, if you like peppermint, you will love these!
I’ve included it in every layer.
It’s in your batter.
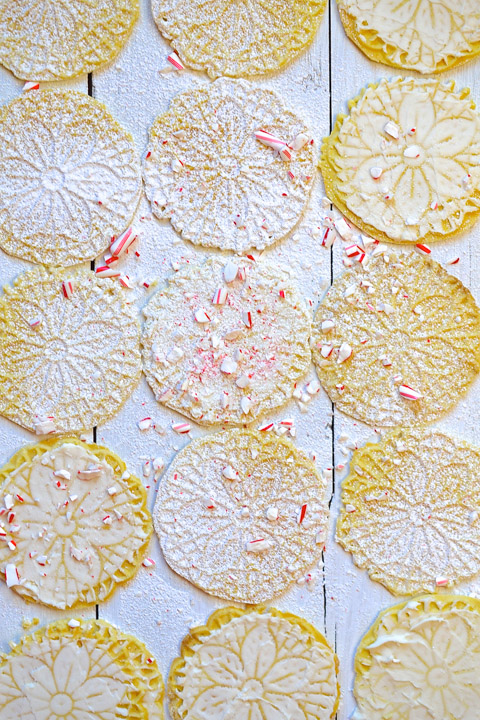
It’s in your buttercream.
And it’s in your candy cane.
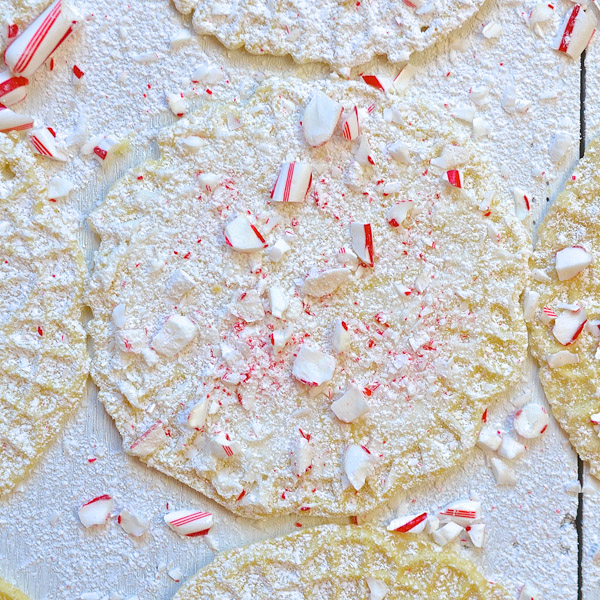
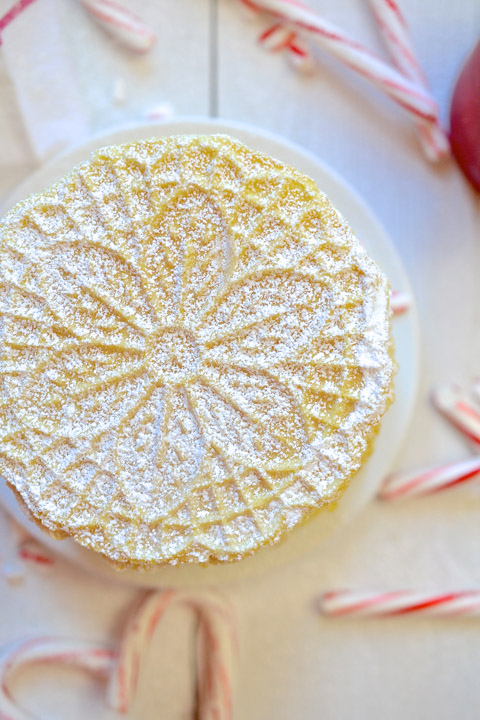
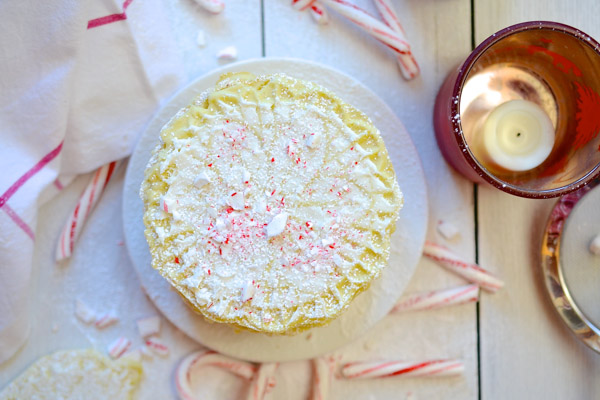
You make the pizzelle. You allow it to cool. You frost it with buttercream. You sprinkle it with powdered sugar. And you finish with a crumble of candy cane…
You’ll probably want to batten down the hatches for this peppermint storm!
Buon Appetito!
Print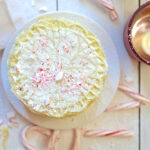
Peppermint Pizzelles with Candy Cane Buttercream
- Category: Dessert
Ingredients
- 3 eggs
- 3/4 cup sugar
- 1/2 cup canola oil
- 1 tsp vanilla extract
- 1/2 Tbsp. peppermint extract
- 1 3/4 cups all-purpose flour
- 2 tsp. baking powder
- 1/2 cup unsalted butter, room temperature
- 3 – 4 cups confectioners’ sugar
- 1 tsp. peppermint extract
- 4 Tbsp. milk
- crushed candy cane
Instructions
- In a medium-sized bowl, beat eggs and sugar until fully combined.
- Add oil, vanilla and peppermint extract and mix again.
- Sift flour and baking powder, add to egg mixture, and mix a final time.
- Batter will be thick and dough-like.
- Follow directions given for use of the pizzelle maker.
- When machine is preheated, drop batter by tablespoonfuls on the center of grid pattern.
- Baking will take approximately 30 seconds depending on your preference for browning.
- Remove pizzelle from the grid and place on the counter to cool.
- In the meantime, prepare buttercream.
- In a small bowl, mix softened butter, confectioners’ sugar, peppermint and milk.
- Spread buttercream on cooled pizzelles.
- Dust with confectioners’ sugar.
- Crumble candy cane over top.
Ciao!
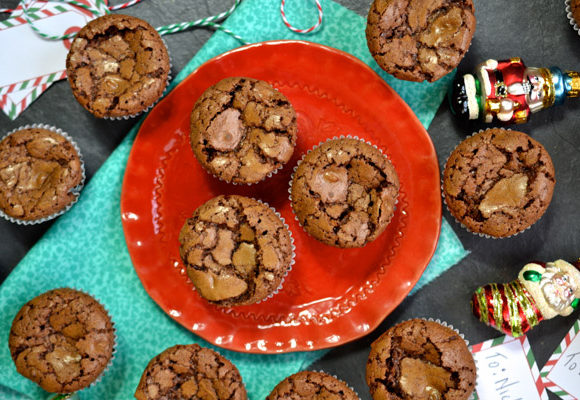
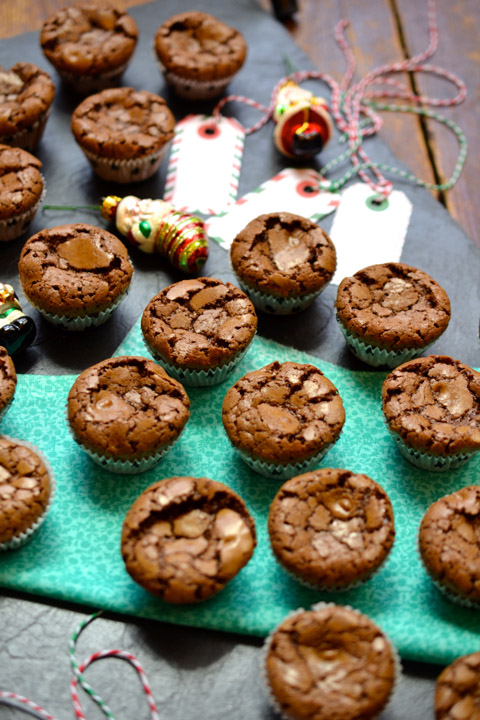
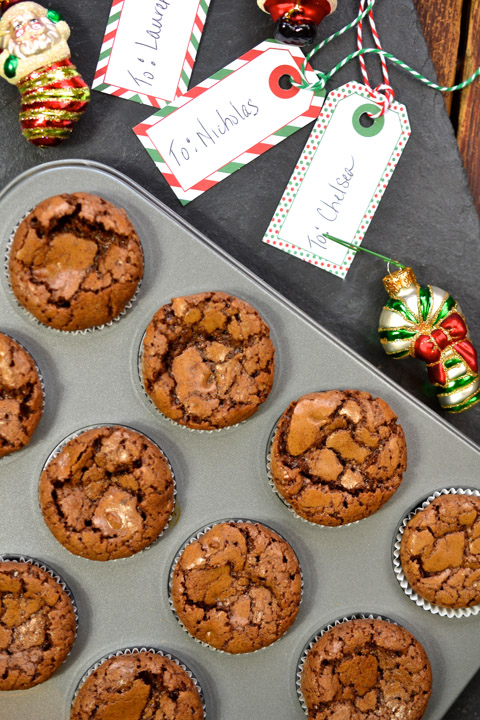
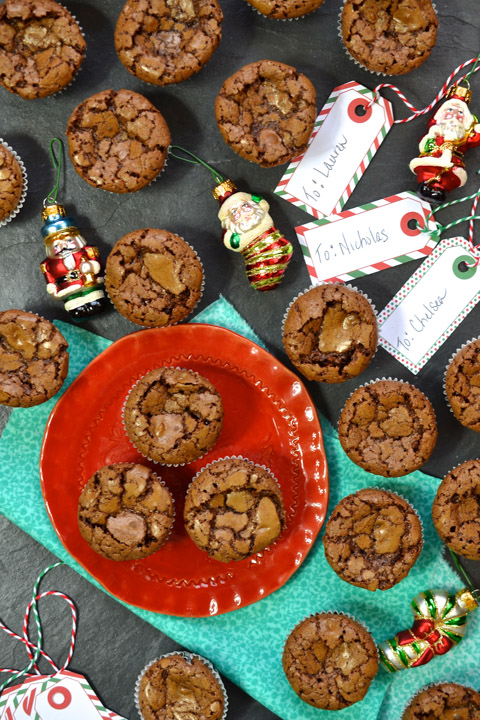
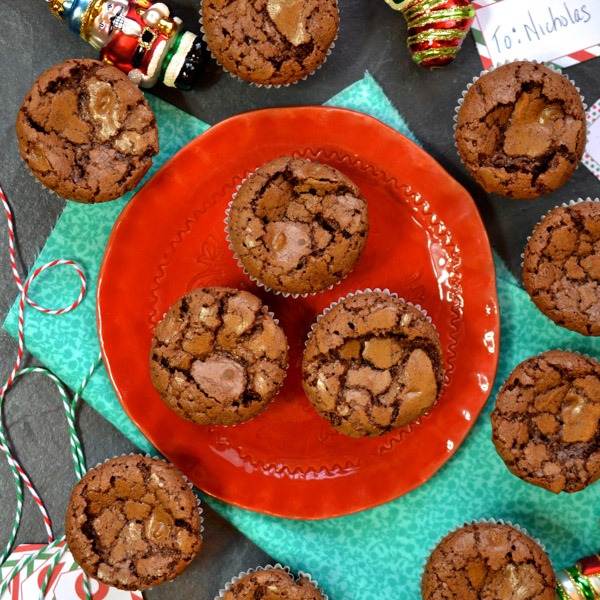
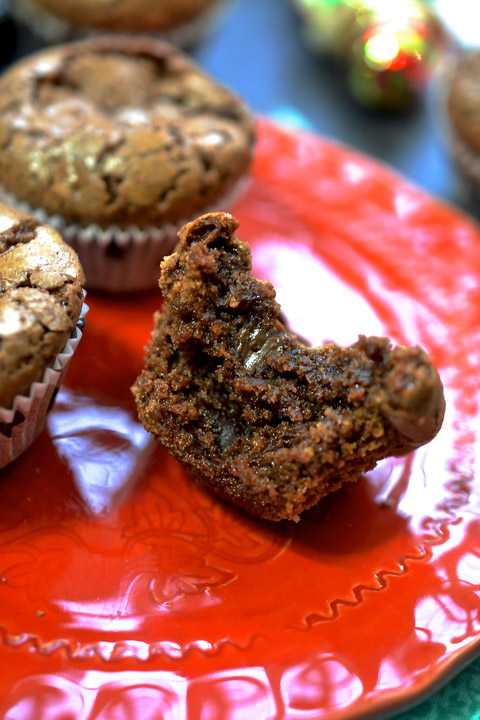
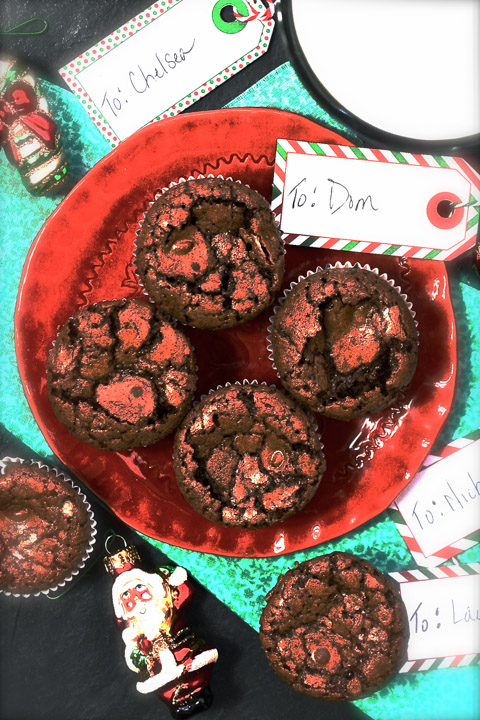
Two-Bite Chocolate Chip Brownies
As Hubby popped a whole one into his mouth, I reminded him of the title…two-bite…he said, okay, I’ll have another…
We. Are. There. My. Friends… Where pedal meets the metal on our quest to getting through these next few weeks in one piece and with smiles on our faces.
It’s great, right? It’s all great, but sometimes a little reward at the end of the day…in the middle of the day and at the beginning of the day is completely warranted.
I have the answer.
Two-Bite Chocolate Chip Brownies. Mm-hmmmm. Or in my hubby’s case, One-Bite Chocolate Chip Brownies.
These tiny little portion controlled treats are not at all tiny on taste.
I could have prepared the recipe in a 9×9 baking pan but I thought it would be more fun, as well as easier eating, to make mini cakes.
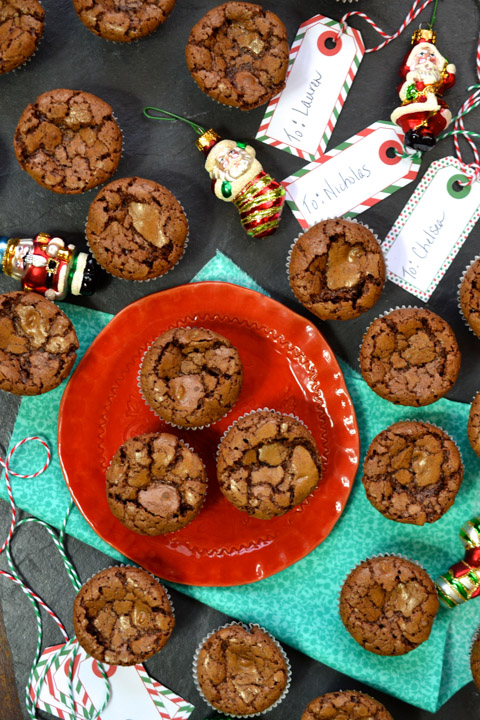
And they “go” with everything…wrapping presents, writing Christmas cards, watching Elf, hanging lights, admiring the tree, shoveling the walkway, waving to neighbors, heading to the mall, waiting in line…you name it – they’re the perfect complement to any of life’s holiday activities.
The thing I love about these little beauts is that they don’t require any fancy equipment…no double boiler…no candy thermometer…just a strong arm and some good old-fashioned elbow grease.
AND, they’re not overly sweet… just the right amount of sweet…
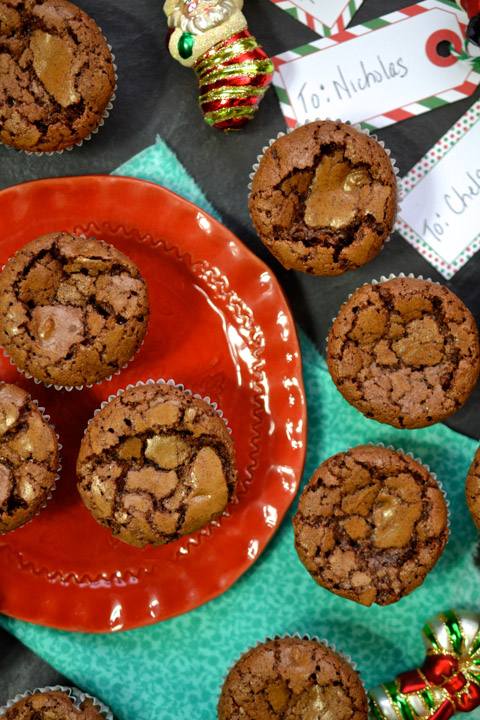
Rich, dense and chocolatey…with just the right amount of crackle…
They’re portable, they’re scrumptious and they are satisfying…
Merry Christmas!
Print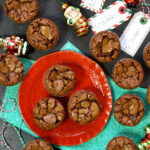
Two-Bite Chocolate Chip Brownies
- Category: Dessert
Ingredients
- 1/2 cup vegetable oil
- 1 cup white sugar
- 1 tsp. vanilla extract
- 2 eggs
- 1/2 cup all-purpose flour
- 1/3 cup unsweetened cocoa powder
- 1/4 tsp. baking powder
- 1/4 tsp. salt
- 1/2 cup chocolate chips
Instructions
- Preheat oven to 350 degrees.
- Prepare two mini muffin tins with small cups.
- In a medium bowl mix the oil, sugar and vanilla.
- Beat in the eggs.
- In a small bowl combine flour, cocoa, baking powder, salt and chocolate chips.
- Slowly stir flour mixture into the egg mixture until well blended.
- Pour batter into the muffin cups.
- Bake for 18-20 minutes until the top starts to crackle.
{Recipe adapted from All-Recipes}
Ciao!
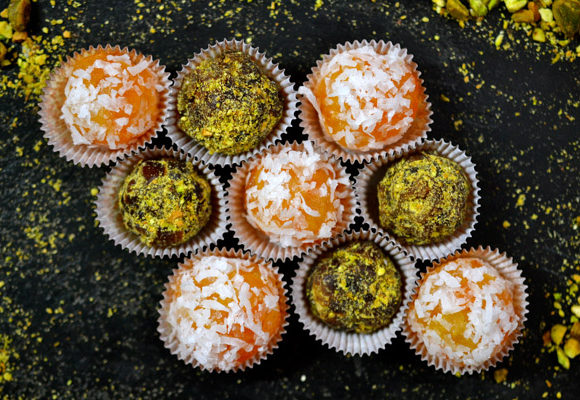
Fruity Bonbons
I should actually have called it Lazy Girl’s Fruity Bonbons…
It doesn’t get any easier than this, my friends.
It’s one that the whole family can get in the kitchen to make together.
And isn’t that what this holiday is all about?
Even your littlest ones whose fine motor skills are up to rolling meatball shaped sweet treats, can join in on this exciting holiday endeavor.

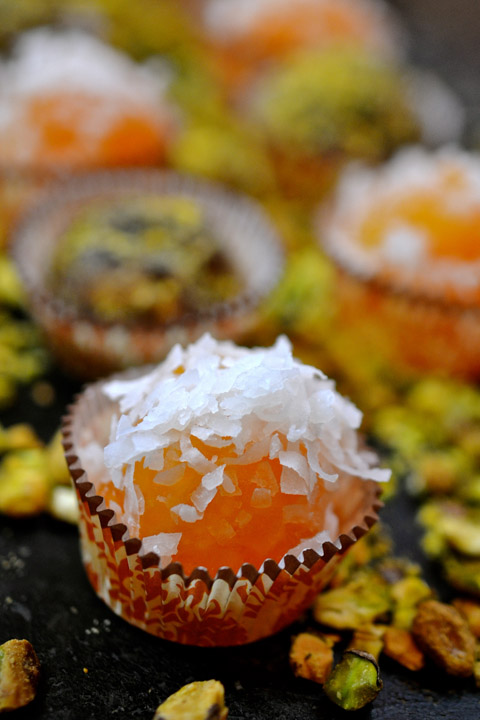
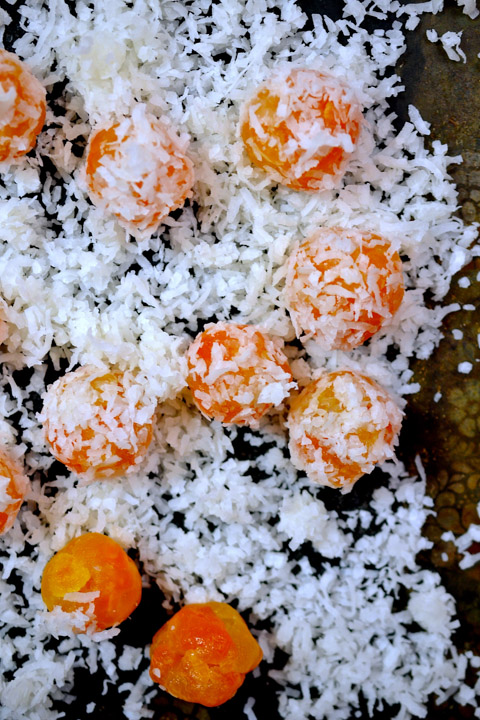
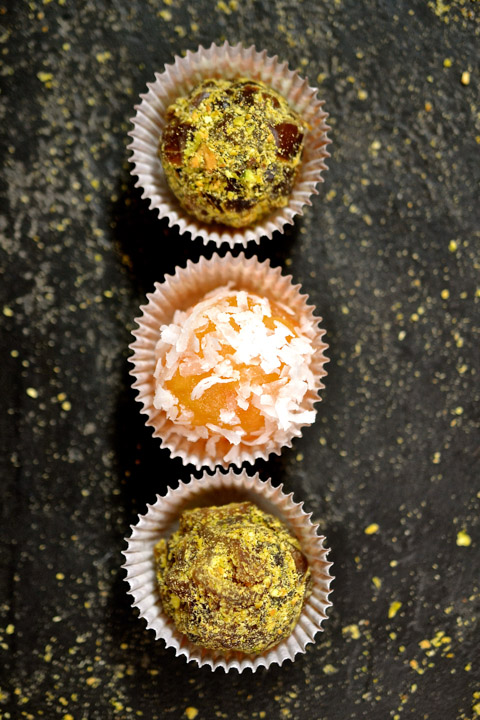
I’ve taken a couple of my favorite dried fruits…
…cantaloupe, which I rolled in coconut…
…and dates, which I rolled in crushed pistachios.
Done.
You could pretty much stop reading now but I hope you don’t…

I had a sense that since I was looking for some nibbles that were both healthy and didn’t require a second pot of coffee to get through prepping…that you might be, too!
For each flavor, simply chop the dried fruit up into small bits, chill for a spell, scoop out a heaping tablespoon and roll into a ball about 1/2″ or so in diameter.
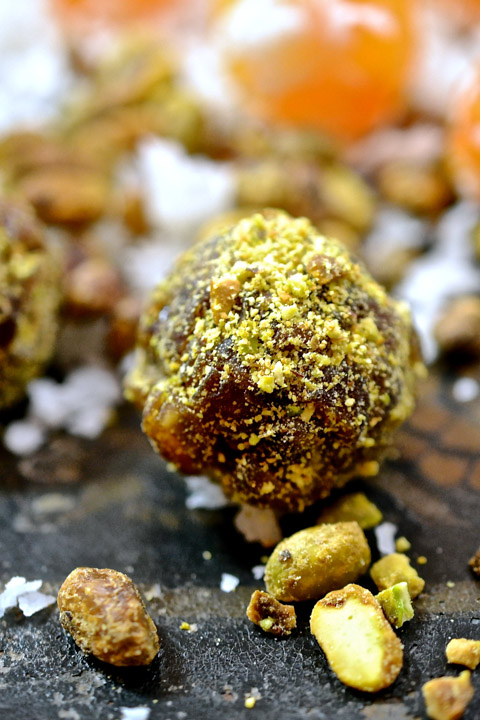
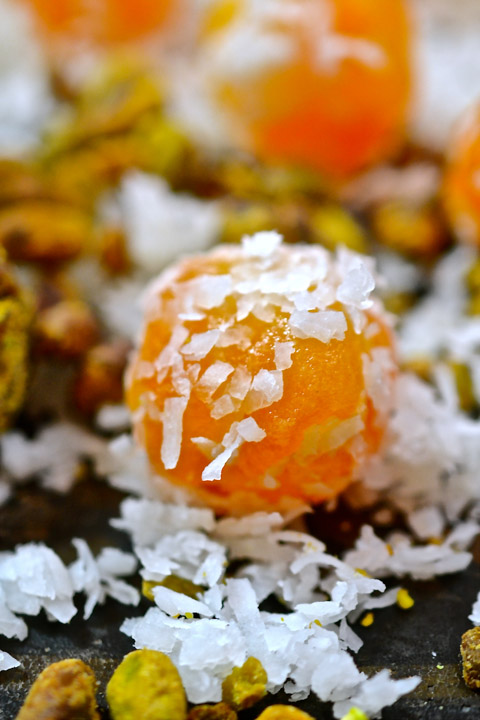
Roll the balls in fun toppings…
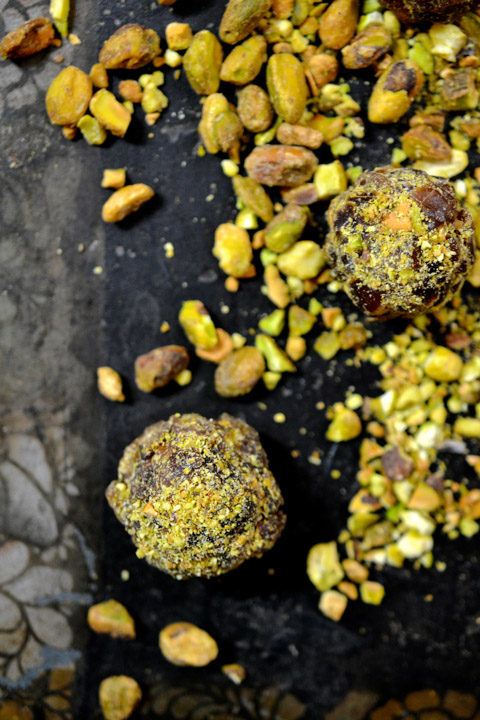
And place them in mini muffin cups.

See what I’m sayin’?
Easy to the point of lazy…
It’s okay…we deserve it. If we can fit at least one recipe in that’s pretty to look at – simple to make – healthy to eat – and has the added benefit of making our little ones proud for having their efforts displayed on the holiday table…
Well, then, it must be done!
Buon Appetito!
Print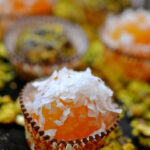
Fruity Bonbons
- Category: Dessert
Ingredients
- 2 cups finely chopped dried cantaloupe
- 2 cups finely chopped dried dates
- 1/2 cup sweetened flaked coconut
- 1/2 cup chopped pistachios
Instructions
- Chop the fruit up into tiny bits.
- Refrigerate each in separate bowls until cold to the touch.
- Scoop out by the tablespoon and roll into balls about 1/2″ thick.
- Roll the cantaloupe in coconut.
- Roll the dates in pistachio.
- Place in mini muffin cups.
- Serve.
Ciao!
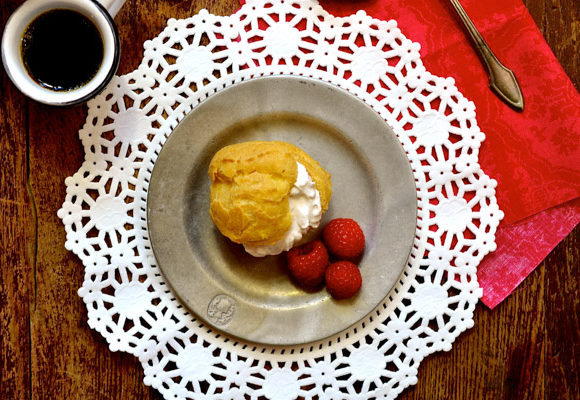
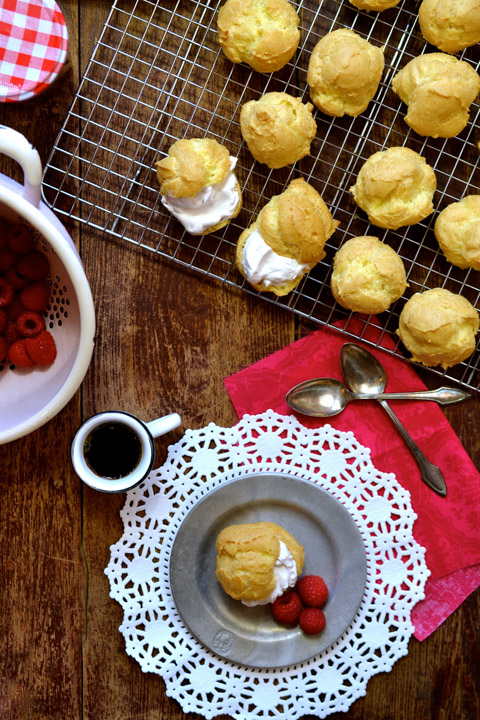
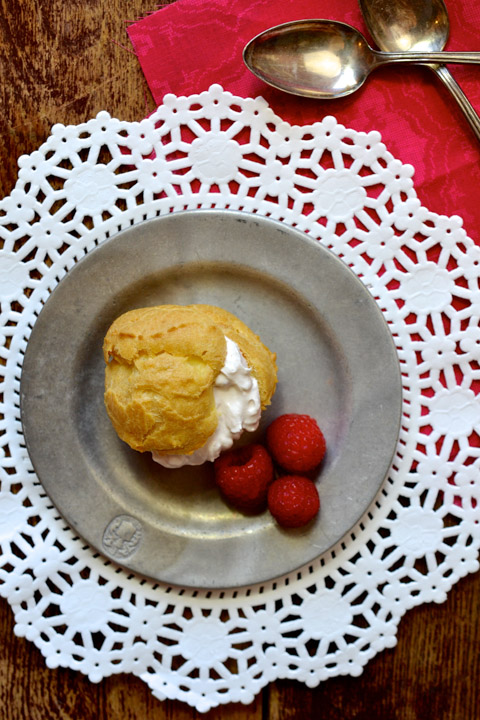
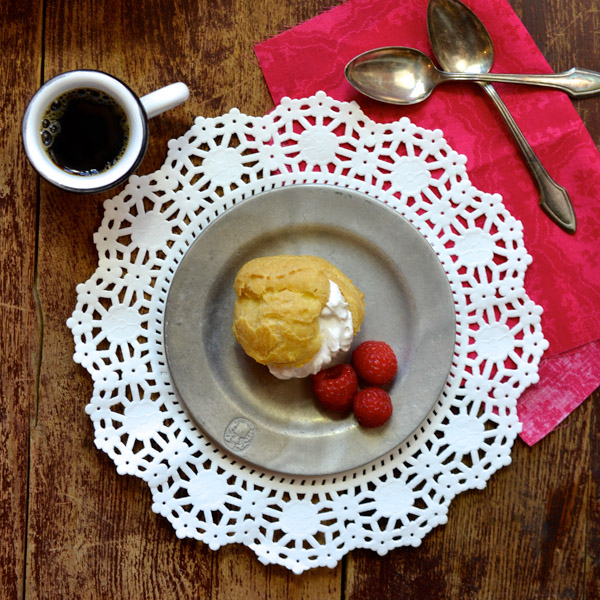
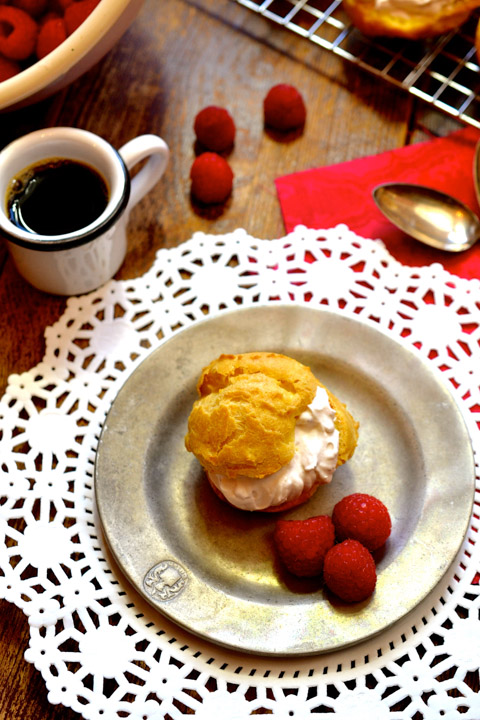
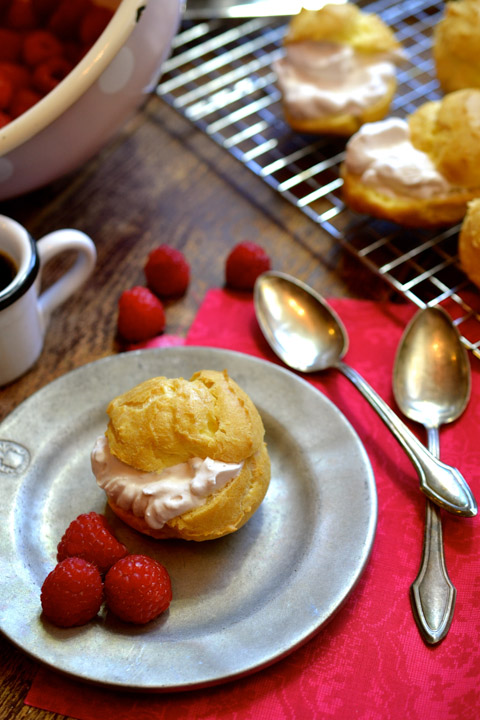
Miniature Raspberry Cream Puffs
We wouldn’t necessarily choose to have cream puffs for dinner…
As a matter of fact, this is likely to be the only time.
But on crazy busy days, when I’ve worked on a post, and there are all sorts of obligations fighting for my attention…we usually eat what Ciao Chow Bambina is offering.
Which means…Miniature Raspberry Cream Puffs it is!
Not ideal? Wait ’til Dom asks what we’re having for dessert…
Cream Puffs.
Hey! We can only do so much…am I right? Thankfully my guy has a sweet tooth, and won’t mind at all!
Actually, we’ll probably have a little popcorn tonight.
When I was growing up and dinner was slim, we knew it was “a popcorn night”! Some things never change! Love it!
I was inspired to make cream puffs as a result of all the beautiful blogs that are now highlighting Christmas recipes.
I thought it would be fun to make these miniature cream puffs (for Christmas) but you could just as easily adapt the filling to suit any flavor composition you’d like. Which means…pumpkin whipped cream slathered in these bite-size puffs would be a lovely dessert for Thanksgiving. Now my wheels are turning.
This recipe comes from my tried and true Italian cooking class…gosh, that little class has paid for itself over and over in delicious food and inspired ideas.
Would you believe me if I told you there are only 7 ingredients in this? And two are for the whipped cream?
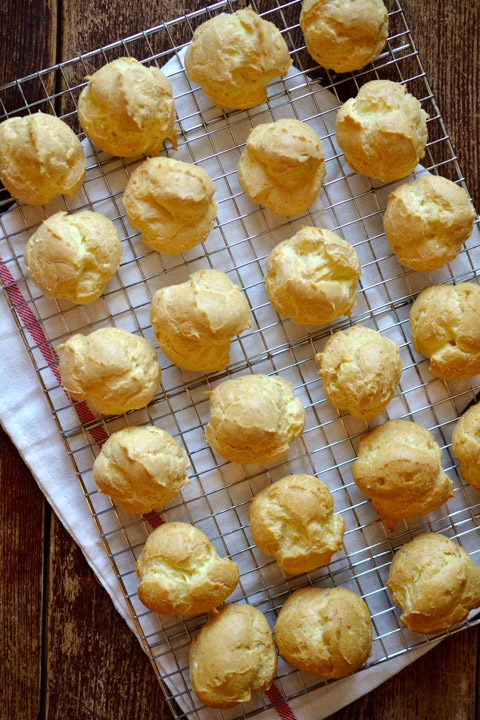
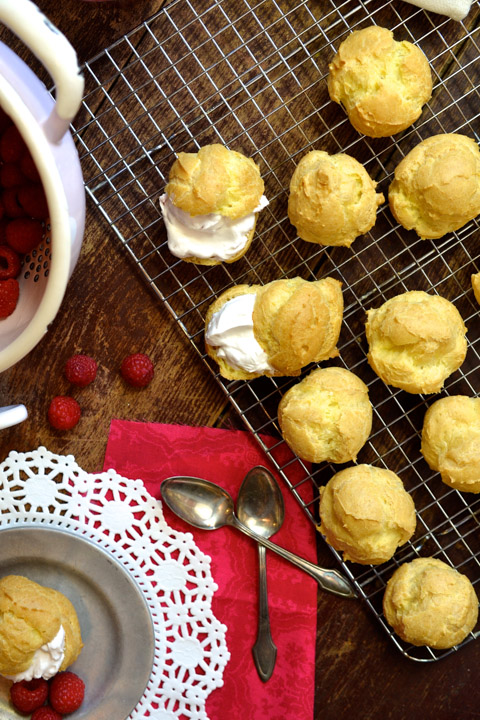
Oh my…when I pulled these babies out of the oven – my day was made.
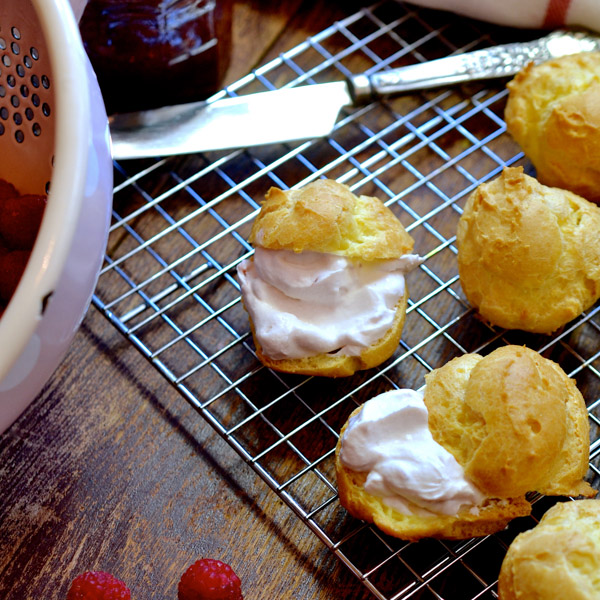
They’re crunchy and egg-y and light, and the perfect tiny vessel for our raspberry flavored whipped cream.
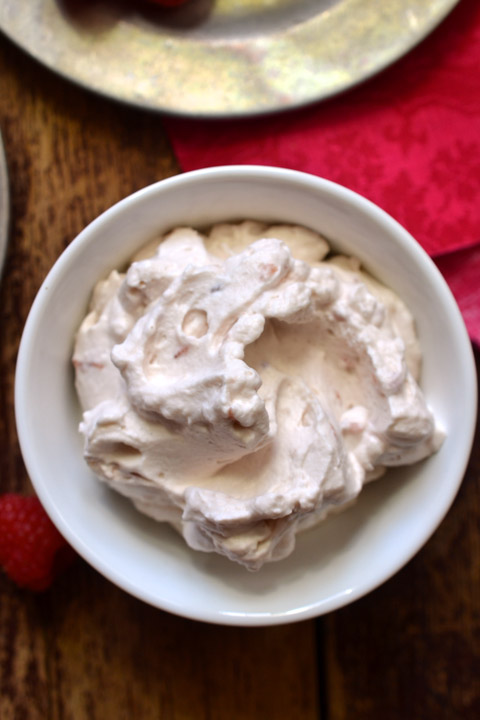
I don’t know why anyone would buy processed whipped cream when you can so easily make it yourself.
We’re talking 1 cup of heavy whipping cream, 1/3 cup jam (any flavor you like) and mix until medium-soft peaks form.
That’s it.
I can imagine it with blackberry preserves, homemade strawberry jam or cinnamon scented pumpkin puree.
I can. I really can.

When making the puffs, you can use either a spoon or a small ice cream scoop to measure out the dough. I use a scoop. I do recommend it if you have one. It gives you consistency and better control over the round shape which is what we’re going for.
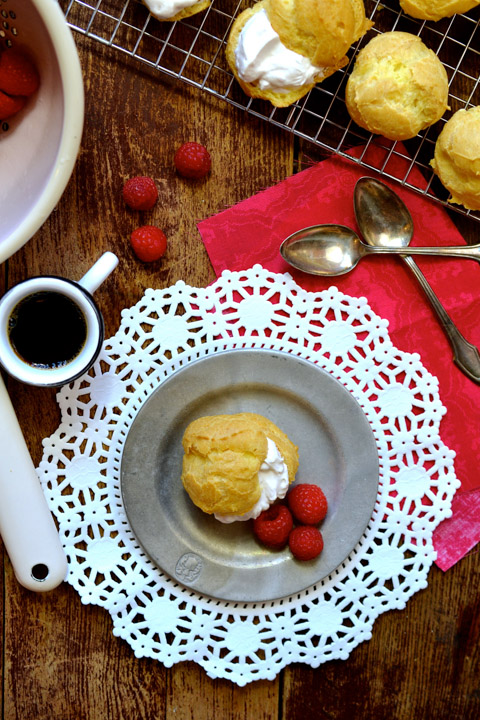
Once they’re baked and cooled, simply cut them in half, horizontally, and fill them with your whipped cream.
You could easily prepare these puffs in advance, and make the flavored cream right before serving.
This will be a hit my friends…for dinner…or otherwise!
Buon Appetito!
Print
Miniature Raspberry Cream Puffs
- Category: Dessert
Ingredients
- 1 stick unsalted butter
- 1 cup boiling water
- 1 cup all-purpose flour
- 1/8 tsp. salt
- 4 eggs
- 1 cup heavy whipping cream
- 1/3 cup raspberry jam
Instructions
- Preheat oven to 400 degrees.
- Combine butter and boiling water in a pan and bring back to a boil.
- Mix flour and salt together and add to the boiling water and stir rapidly until mixture leaves the sides of the pan.
- Remove from heat.
- Beat in eggs, one at a time, until dough is smooth. It will come together all at once when the final egg is mixed in.
- Drop by spoonfuls on greased cookie sheet.
- Bake at 400 degrees for 10 minutes, then drop the temperature to 375 degrees for 25 minutes.
- Remove from oven and let cool.
- In the meantime, mix the whipping cream with the jam until medium-soft peaks form.
- Cut the puffs in half, horizontally, and fill with cream.
- Put upper half on top.
- Serve.
Ciao!
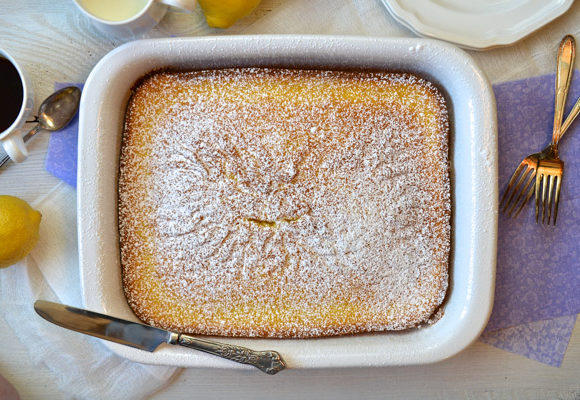
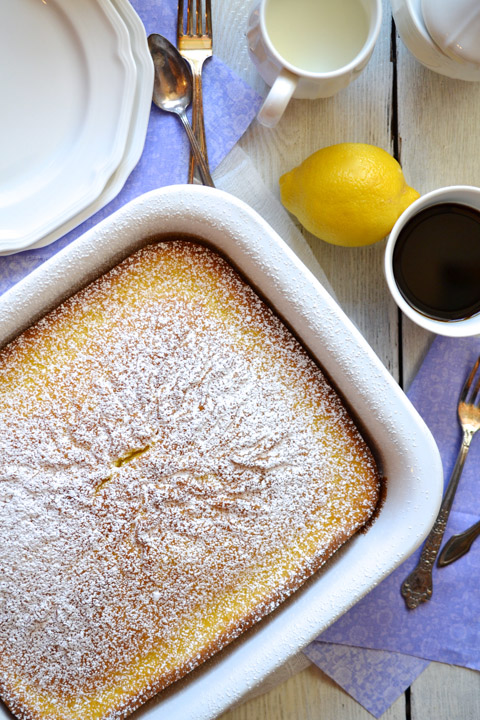
Lemon Ricotta Cake
Chances are you like ricotta. And chances are you mainly enjoy it with pasta.
But have you tried it in cake?
Yes? Then you know the treat you’re in for.
No? Get ready…
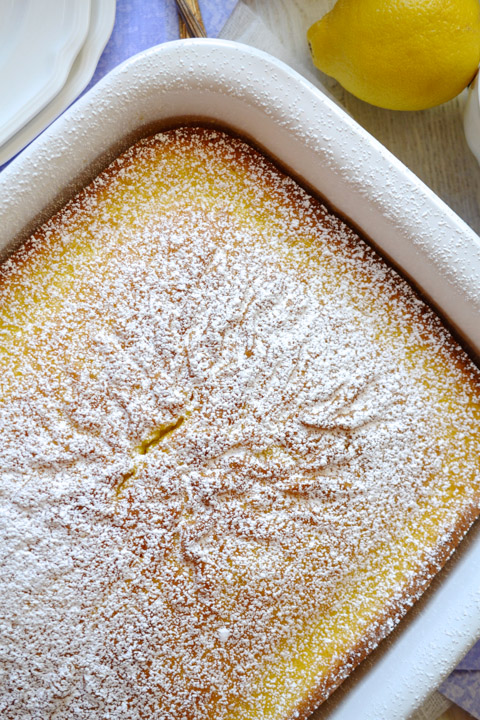
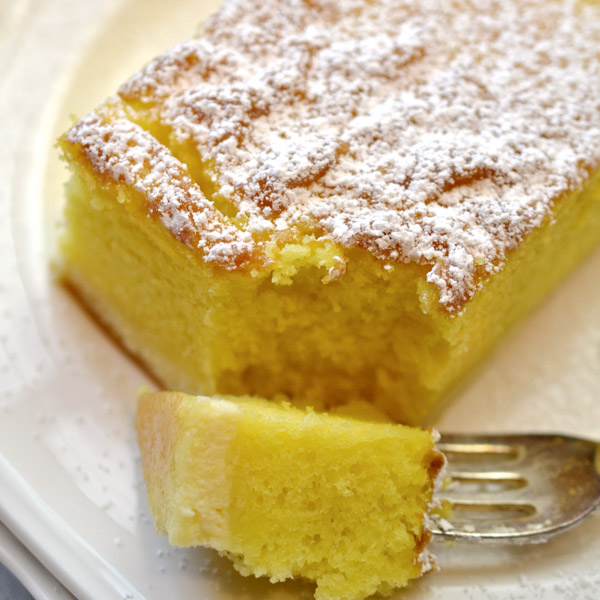
This lemon cake, which starts with a box mix (you read that right) and ends with a layer of creamy sweetened lemon scented ricotta, will answer all your prayers for a quick dessert that tastes like you spent. some. time.
This recipe was a gift I received a long time ago from an Italian cooking class I took as a very young lady. Like early 30’s young lady…Oh my.
It’s a recipe that the chef prepared for a lot of people – for many years – which means it has stood the test of time.
She fed a lot of happy full noisy people who clamored for something a little sweet at the end of their big dinner. A meal that likely included antipasti, a cup of minestrone, a couple glasses of wine, a bowl of gnocchi and a side of beef braciole.

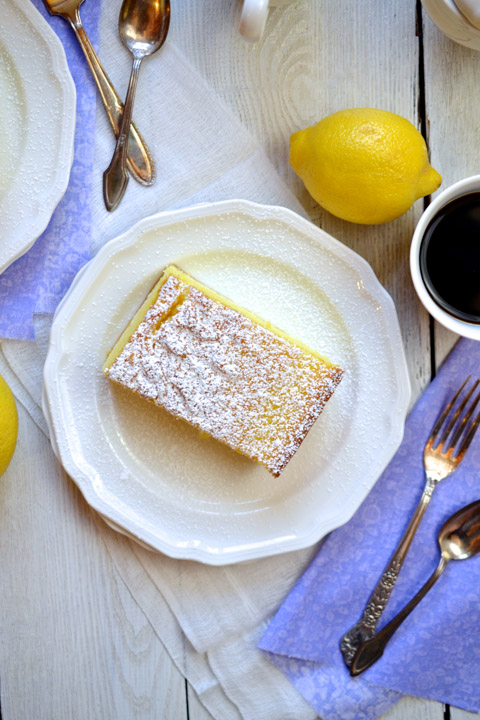
This lovely lemon ricotta cake in all its light tender splendor was a typical offering.
And along with its pleasing flavor it’s a dessert that can be prepared in the time it takes to set the table, pour the wine, fluff your hair and apply your lipstick. Lip gloss. Lip stain..whatever we’re calling it these days.
The point is… It’s delectable. It’s quick. And it’s easy.
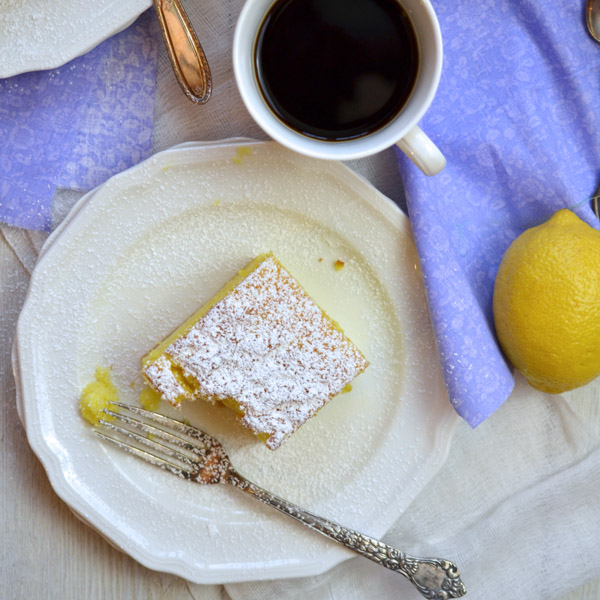
I enjoyed my piece with a nice cup of strong black coffee. Mmmm. But it would be just as lovely with a steaming cup of tea or a spot of Sambuca.
Buon Appetito!
Print
Lemon Ricotta Cake
- Category: Dessert
Ingredients
- 1 lemon cake mix
- 1 lb. ricotta
- 2/3 cup sugar
- 2 eggs
- 1 tsp. lemon extract
- 1 tsp. vanilla extract
- Confectioners’ sugar to sprinkle
Instructions
- Preheat oven to 325 degrees.
- Grease and flour a glass 9 x 13 pan.
- In a large mixing bowl, prepare lemon cake as directed on box.
- In a separate medium-sized bowl, using a hand mixer, combine the ricotta, sugar, eggs, and both extracts.
- Pour the cake batter into the pan then pour the ricotta mixture over top.
- Bake for 45 – 55 minutes (depending on your oven). Check that it’s finished using a toothpick.
- Allow cake to cool.
- Sprinkle with confectioners’ sugar.
- Serve.
Ciao!

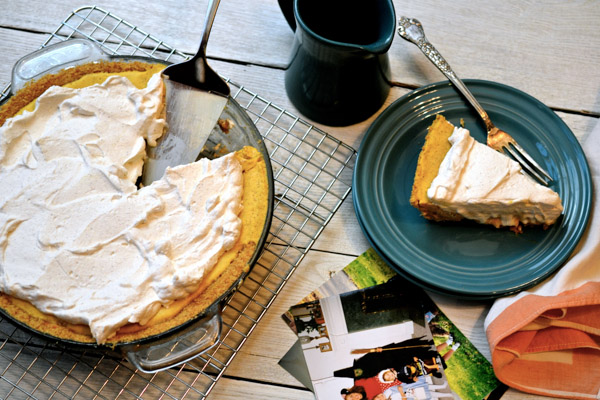
Pumpkin Ice Cream Pie with Cinnamon Whipped Cream
It’s been a long time since I first made this pie…
The year was 1998, the day, Halloween. Our families came over to see the kids in their playful attire…Lucy dressed as a scary witch, Chels as Dorothy, and Nick, our little hockey player.
Dom made his famous hot and spicy chili and I, this Pumpkin Ice Cream Pie with(out) Cinnamon Whipped Cream.
It was a nice meal. A really nice meal. And it was the first time I had ever made anything ‘pumpkin’. I wasn’t a huge fan of pumpkin pie…thankfully my taste-buds have evolved since then…but I thought it was about time I dip my big toe in the pumpkin pool and at least try something simple.
So glad I did.
BUT…
I was clearly not so glad that I held on to this delicious recipe…for the life of me, all these years later…I haven’t been able to put my hands on it.
Which brings us to today…I used my memory to serve me as I’ve recreated the pie that got away…
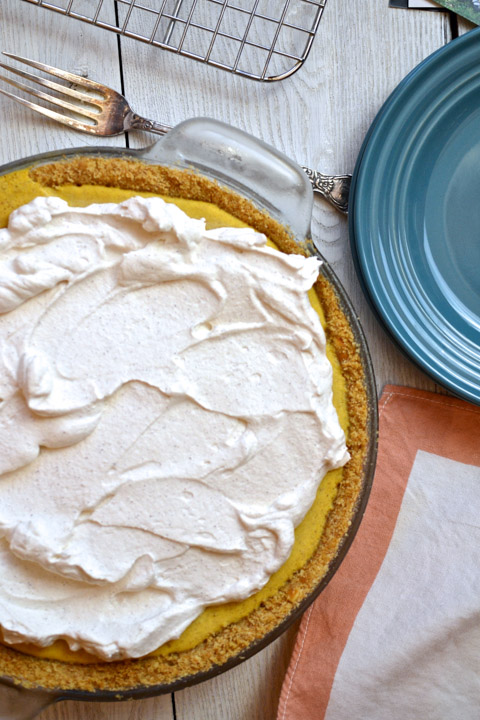
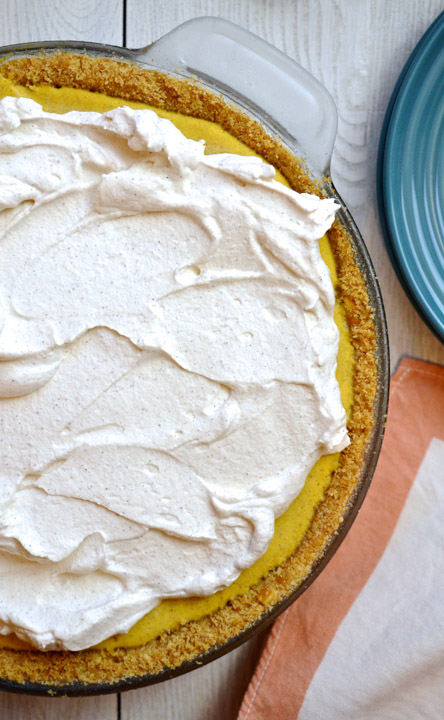
I did a couple things differently… I used Nilla wafers for the crust, and I topped it with cinnamon-y whipped cream. Oh yes – this is happening.

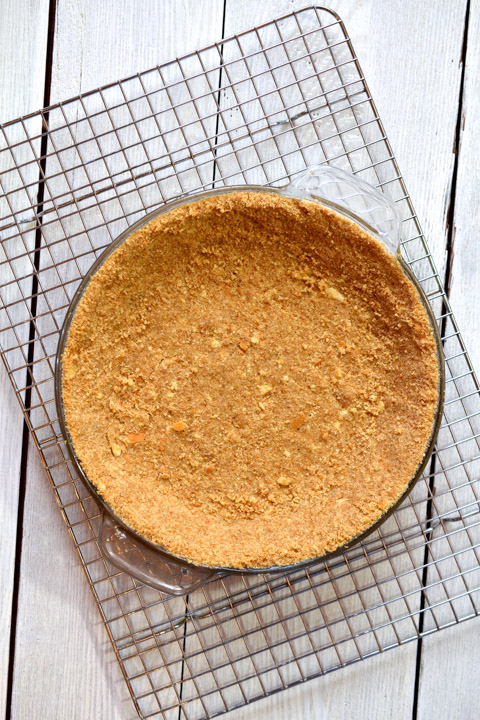
I ‘m very certain I used a store bought graham cracker crust the first time, which of course, is awesome, however, I thought to myself, since I’m recreating this baby from scratch, I might as well go all the way.
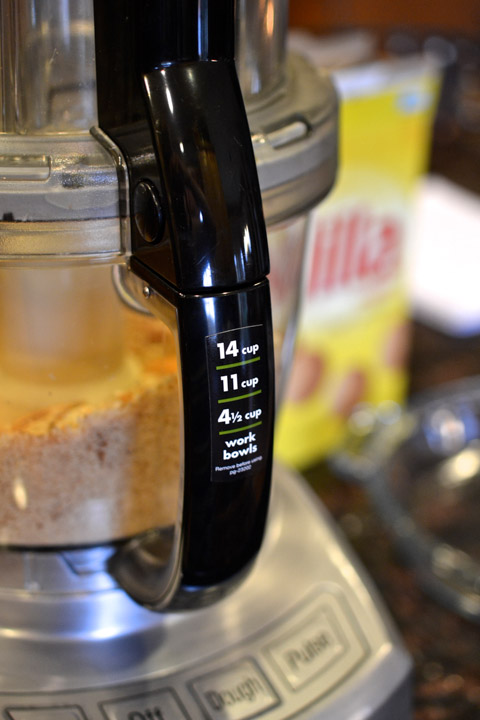
To make this homemade crust, it’s really quite simple. Take a box of wafers, grind them in a food processor with a little brown sugar, then, in a separate bowl, add a stick of melted butter, and mix.
Next is where it really gets fun…building your crust. It’s important to have a gentle but firm touch when manipulating the crumbs. It’s kind of like building a sand castle. And then you get to eat it.
Once your crust is ready to go, pop it in the oven for about ten minutes to set. Remove and be sure to cool it before filling with your pumpkin mixture.
The filling consists of vanilla ice cream, pumpkin purée, pumpkin spice, vanilla and cinnamon.
Throw everything together in a bowl. Whisk, whisk, whisk.
Pour into your cooled crust.
Throw it in the freezer, well, don’t throw it – you’ll end up with soft pumpkin ice cream all over the front of you – perhaps I know a little something about this ;)…
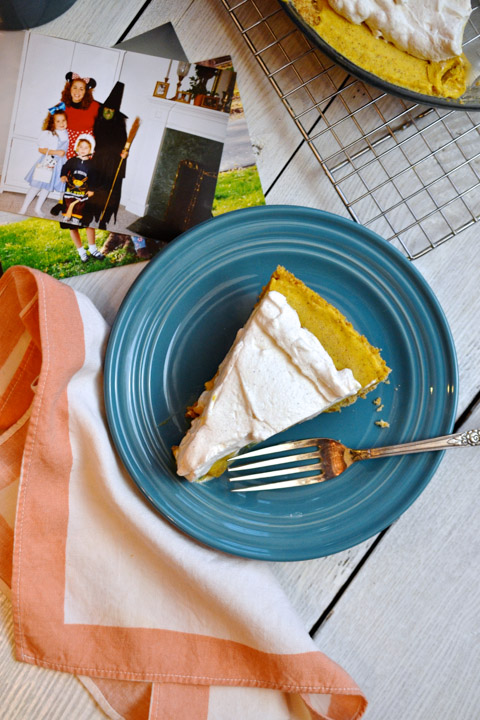
Freeze for a few hours until hardened, then top with beautiful soft peaks of homemade whipped cream.
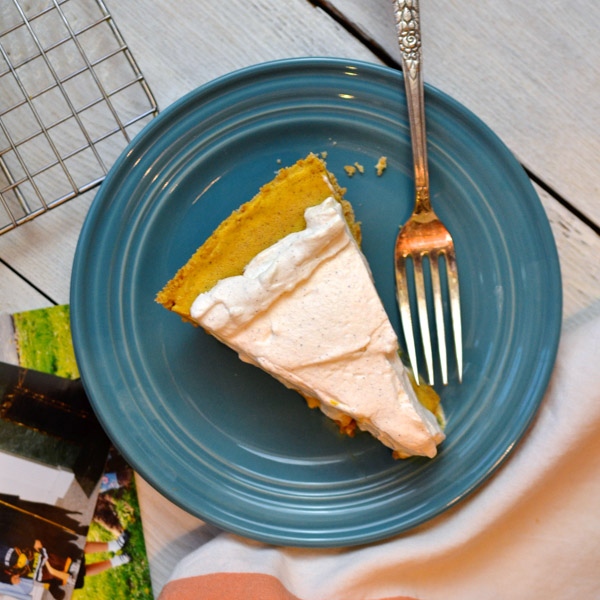
I tell you what…if you’re craving the flavor of pumpkin pie but also have a hankering for ice cream – this dessert is your ticket!
Buon Appetito!
Print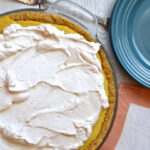
Pumpkin Ice Cream Pie with Cinnamon Whipped Cream
- Category: Dessert
Ingredients
- 1 11oz. box Nilla wafers
- 1/4 cup brown sugar
- 8 Tbsp. unsalted butter, melted
- 3 cups vanilla ice cream
- 1 cup pumpkin purée
- 1 Tbsp. vanilla
- 1 1/2 tsp. pumpkin pie spice
- 1 tsp. cinnamon
- 1 cup whipping cream
- 1/2 tsp. vanilla
- 1/4 tsp. cinnamon
- 1 Tbsp. confectioners’ sugar
Instructions
- Place wafers and brown sugar in a food processor (or blender) and pulse until a fine crumb forms.
- In a separate bowl mix crumbs with melted butter and with your hands mix until fully combined.
- Form crust in a pie plate.
- Pre-bake crust for 8 – 10 minutes until dry and aromatic.
- Remove from oven and cool completely before proceeding.
- In a large bowl whisk ice cream, purée, vanilla, pumpkin pie spice and cinnamon.
- Pour into prepared crust and freeze for a few hours until hard.
- Just before serving, in a medium sized bowl, whip whipping cream, vanilla, cinnamon and confectioners’ sugar until soft peaks form.
- Top pie with whipped cream.
- Serve.
Ciao!
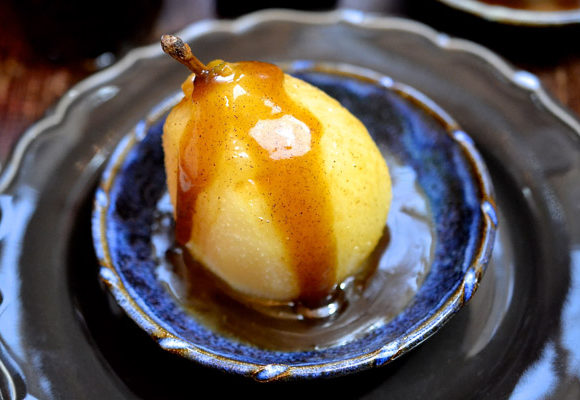
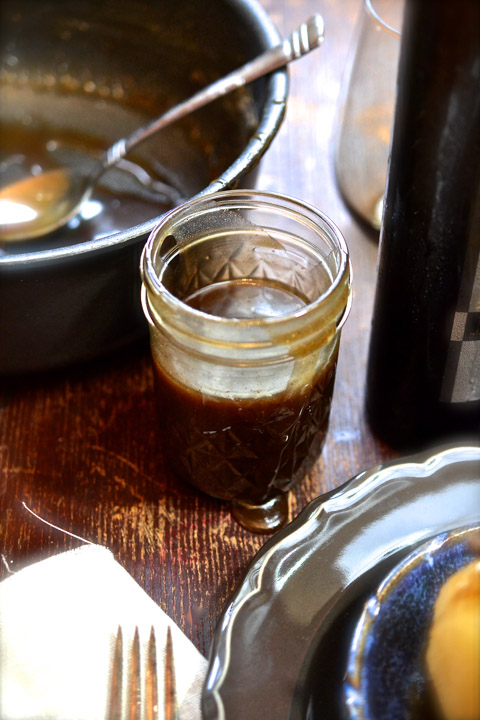
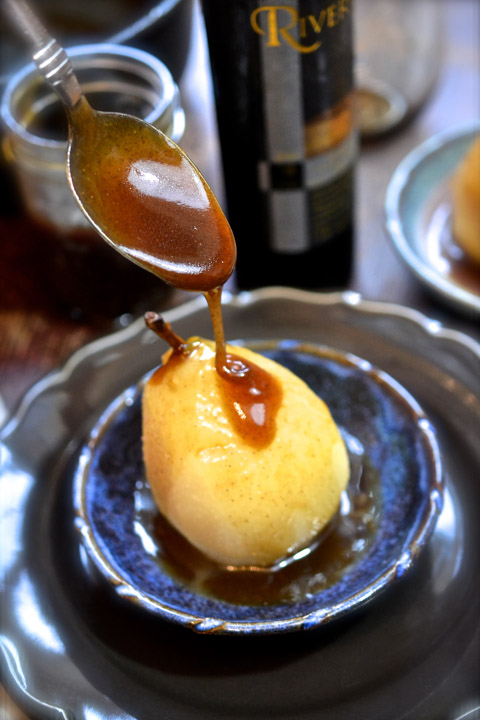
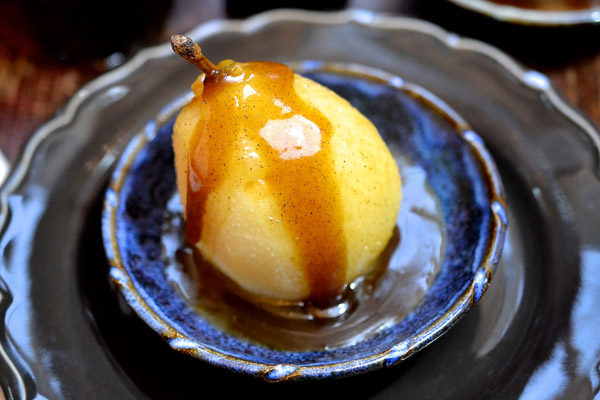
Poached Pears with Hot Caramel Cinnamon Sauce

I’ve saved this very recipe for this very day with very good reason…
You know why?
Because…… it’s…… SCARY GOOD!!
Get it?
Scary good?
Halloween?
I’m just kidding – of course you get it.
But I am not kidding about how excellent this dessert is. Let me tell you a little story…
Some years ago, our neighbors and we would get together for food & wine pairing nights. Once a month or so we’d gather at one of our homes and bring along a dish and wine that complemented each other. We would share our bounty along with brilliant insight about our pairings. We came dressed in our imaginary sommelier hats and loved every minute of it.
Now, the night that Dom and I hosted, we thought it would be fun to pair a rich red with a chocolate dessert. So we purchased a chocolate fountain, and all the foody-accoutrement that we wanted for dipping. Do you remember those fountains? Do they even make them anymore?? Anyway – just as our guests were about to arrive we noticed that the beautiful cascade of molten chocolate, that had been flowing all afternoon as we prepared for our party, was no longer cascading but instead was pooling and hardening in the shiny bowls below…which meant our decadent dessert with our nice bottle of red now included marshmallows, strawberries and pound cake… sans chocolate.
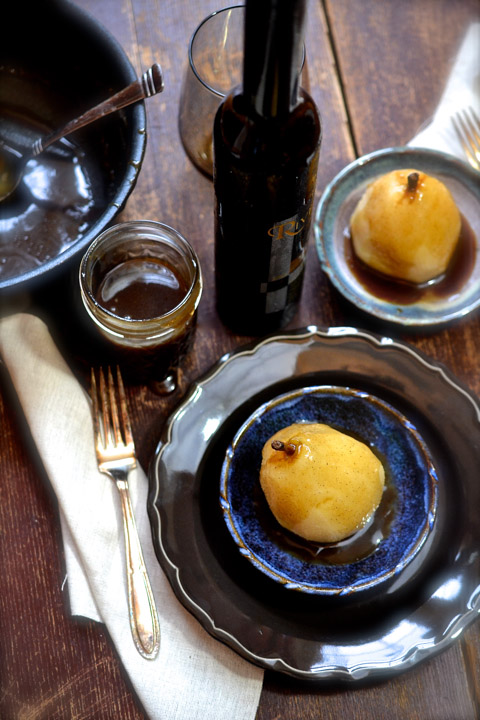
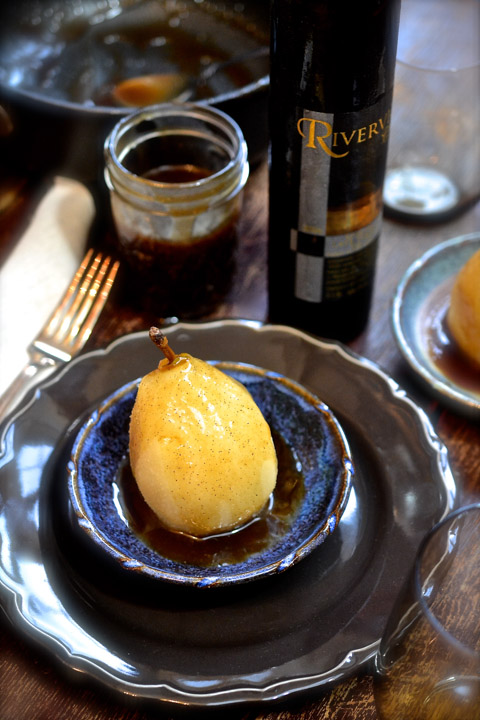
However – little did I know – my fabulous friend Jamie – would soon save the day with her Ice Wine and Poached Pears with Caramel Sauce.
Dessert restored.
Our sweet friend, Jamie, moved to Tennessee six-ish years ago and truth is our neighborhood soirées declined following her family’s move. Of course, life’s natural ebb and flow has a lot to do with the amount of socializing we do, but truth is, our little street just wasn’t the same after this beautiful family left. Our kids were pals, my girls babysat her little ones, our husbands were buds, and she was and still is my sister-friend. Regardless of the miles between us, our families will be family forever.
And now I get to share her splendid recipe.
This actually is quite fun to make.
But even more fun to eat.
This particular caramel sauce is a perfect complement to the sweet pear which is a perfect complement to the Ice Wine that just so happened to be in my refrigerator. It was my lucky day…
Okay, so this wouldn’t be a proper Halloween post without a little spook, so I’ve saved the best, most scary pear picture, for the end. This warning comes as an alert…if your kids are in the room, you may want to ask them to leave. It’s pretty graphic.
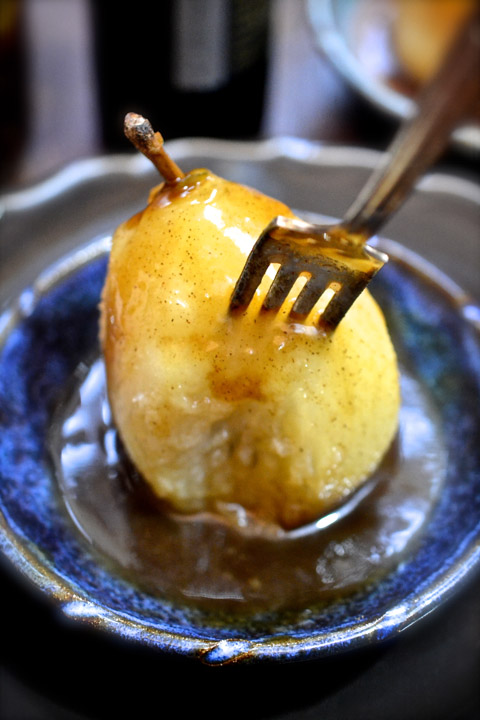
See what I mean? Scary.
Enjoy the pears and enjoy your evening!
Have a safe and fun Halloween my friends!!
Buon Appetito!
Print
Poached Pears with Hot Caramel Cinnamon Sauce
- Category: Dessert
Ingredients
- 3 cups water
- 1/2 cup granulated sugar
- 1 Tbsp. lemon juice
- 4 almost ripe pears, stems on
- 1 cup light brown sugar
- 1 Tbsp. flour
- 1 cup boiling water
- 2 Tbsp. butter
- 1 tsp. cinnamon
- 2 tsp. vanilla
Instructions
- In a large pan combine water, sugar and lemon.
- Bring to a boil over medium-high heat.
- Peel and core the pears, leaving the stems in tact.
- Add pears to the boiling syrup.
- Reduce heat and simmer gently.
- Cover with a lid and let simmer for 10 minutes.
- Turn pears and let simmer for another 10 minutes until tender.
- In the meantime, mix sugar and flour in a small pot. Stir in the boiling water.
- Cook gently, stirring constantly until slightly thickened.
- Add butter and simmer for another 8 minutes.
- Remove from heat and whisk in the cinnamon and vanilla.
- Pour hot caramel sauce over pears.
{Caramel Sauce adapted from Spicehouse}
Ciao!
Orange Biscotti with Grand Marnier
Do I say this too much?
Maybe I do…but I don’t think so. And even if I do, it’s always the truth.
So here it is…
This is my new favorite!!! I will scream it from the rooftops! I am not kidding – this is the most spectacular biscotti I’ve ever had.
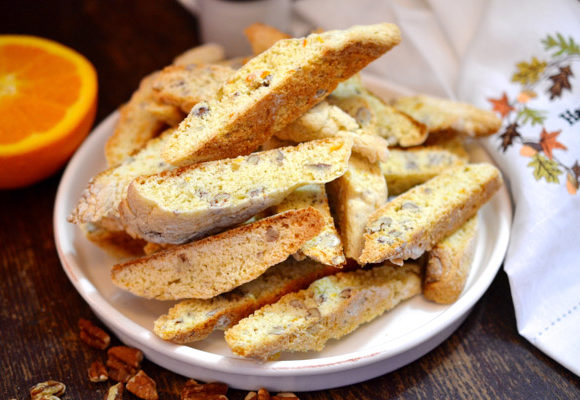
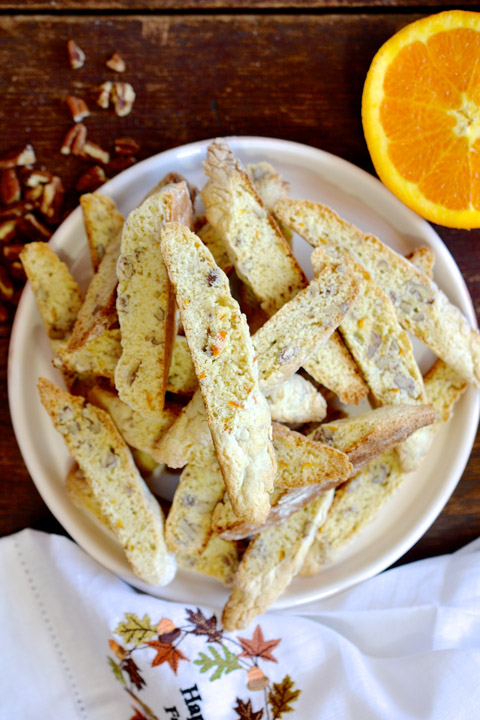
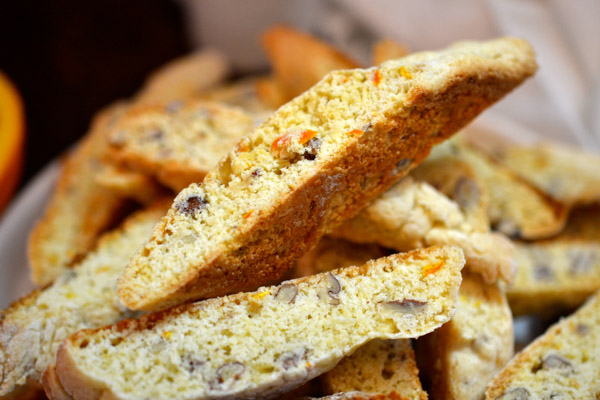
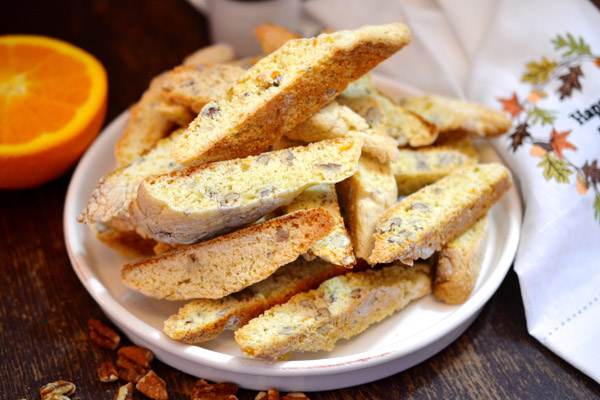
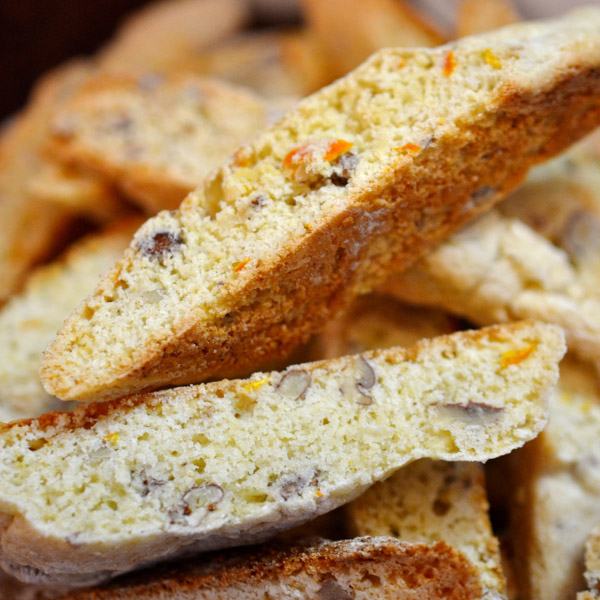
I love the citrus-y orange-y nutty fragrant tantalizing mouth-watering fresh-baked flavor you get with every bite of this Orange Biscotti with Grand Marnier.
Yeah, you read that right. Grand Marnier. Fancy.
The orange flavor in this little cookie is both mellow and bright. It’s like the sunshine in late morning that has slowly burned away the clouds. Like the sun, its flavor slowly sneaks up on you until it’s fully present and making your day.
I don’t know how else to convince you to make this.
I’ve made it a few times, now, and each time I add a little more fresh orange juice. I just can’t help my self.
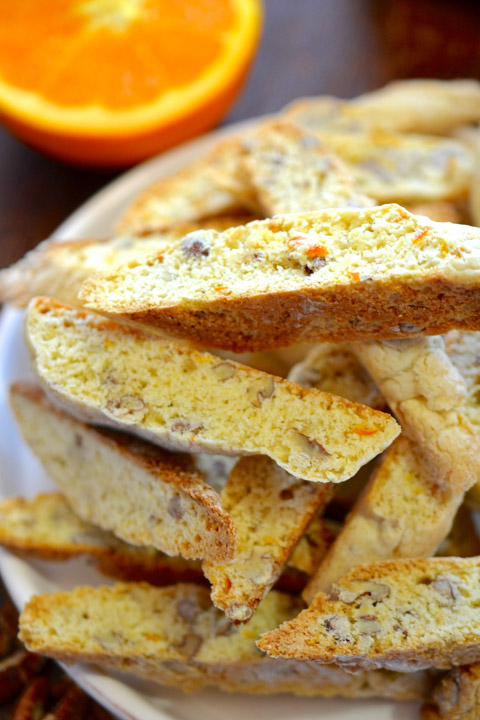
I mean look at that orange zest dotting this little beauty.
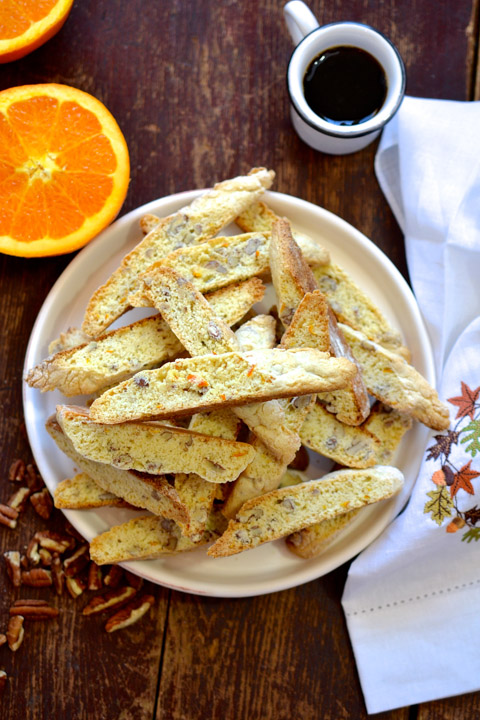
And those pecans showing up to offer a delicate nutty flavor to each crunchy bite.
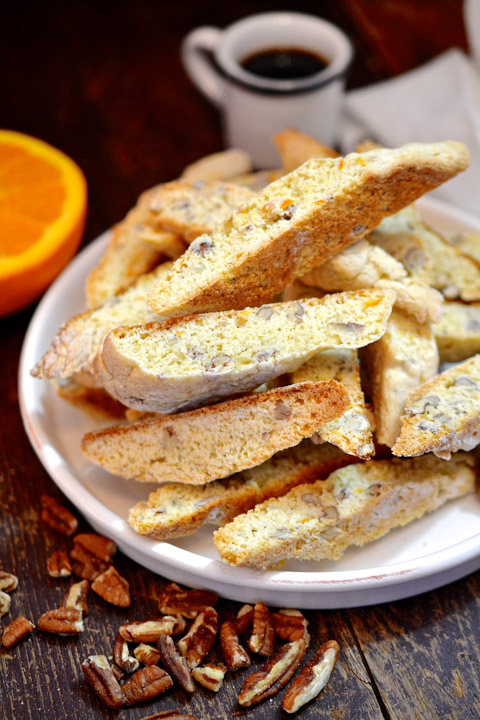
I will never look at biscotti the same way again…and here’s the thing – it’s crunchy but not hard like some biscotti can be – there’s enough softness in the center to create just the right balance between chewy and crispy.
This will be a perfect little treat to have on the table…24/7…during the holidays. You sit down to have a cup of coffee, it’ll be there. A game of cards and a glass of wine, it’ll be there. Hot tea with a splash of cream, it’ll be there.
So happy I discovered this recipe.
My world will never be the same.
Buon Appetito!
Print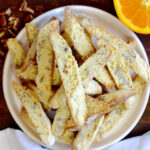
Orange Biscotti with Grand Marnier
- Category: Dessert
Ingredients
- 2 2/3 cups all-purpose flour
- 1 1/2 cups granulated sugar
- 2 tsp. baking powder
- 3/4 tsp. salt
- 1/4 – 1/2 cup grated zest of 2 oranges
- 1 cup coarsely chopped pecans
- 3 large eggs, room temperature
- 5 Tbsp. olive oil
- 3 Tbsp. freshly squeezed orange juice
- 2 Tbsp. orange liqueur such as Grand Marnier
Instructions
- Preheat oven to 350 degrees.
- Prepare two baking sheets with silicone mats or parchment paper.
- In a large bowl whisk the flour, sugar, baking powder and salt.
- In a separate bowl combine about 1 Tbsp. of flour with the orange zest. Rub them together to keep it from clumping.
- Add the zest and the pecans to the large bowl and stir to combine.
- In a small bowl whisk the eggs with the olive oil, orange juice and Grand Marnier until well blended.
- Pour into the center of the flour mixture and stir with a wooden spoon until combined.
- The dough will be sticky.
- Dump the dough onto a heavily floured work surface and divide into six equal parts.
- Roll each into a 12 inch log, dusting with flour along the way to keep the dough from sticking.
- Set the logs about 3 inches apart on the prepared baking sheets.
- Press each log gently so they’re about 2 inches wide.
- Bake for 10 minutes then rotate pans and bake for another 15 minutes until golden and the tops are fairly firm.
- Remove from oven and let cool on racks for about 10 minutes, leaving the oven set at 350 degrees.
- Transfer logs to a cutting board and using a serrated knife, cut slices on a sharp diagonal into 1/2 inch thick slices.
- Arrange the slices on the baking sheets and place back in the oven for 5 minutes.
- Rotate baking sheets and bake for another 10 minutes.
- Allow the cookies to cool on the baking sheet for about 5 minutes.
- Store at room temperature or freeze in an airtight container.
{Recipe adapted from Liv Life.}
Ciao!
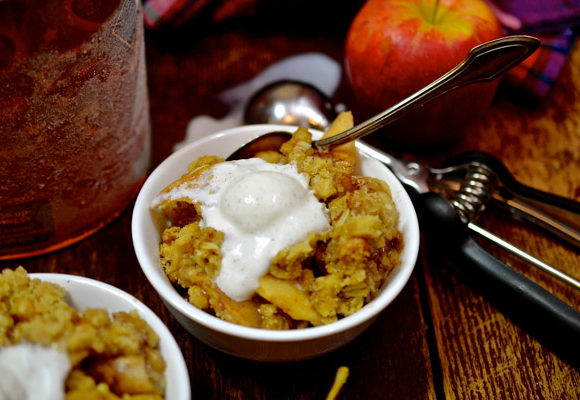
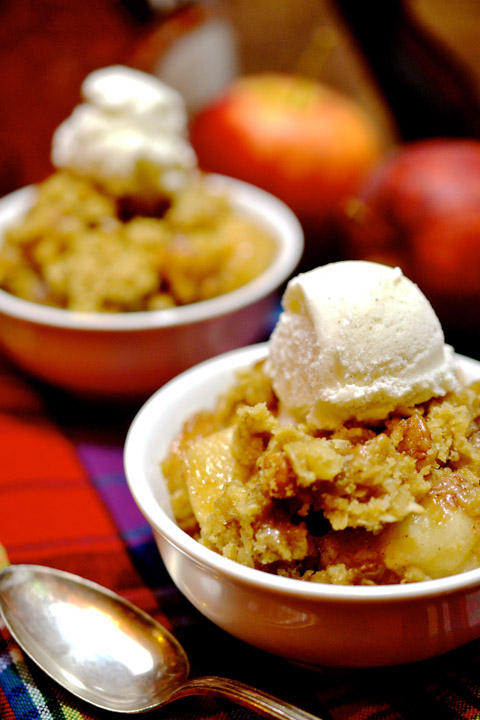
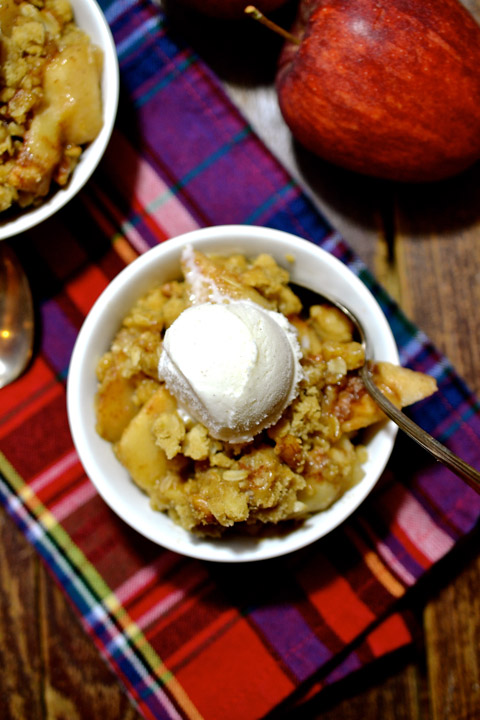
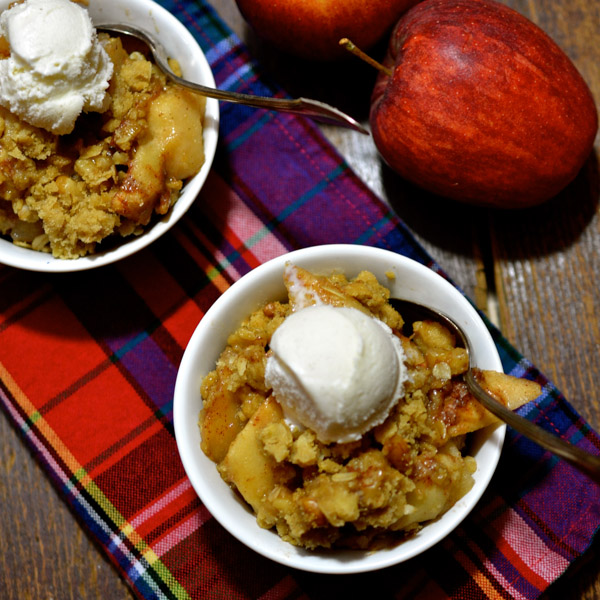
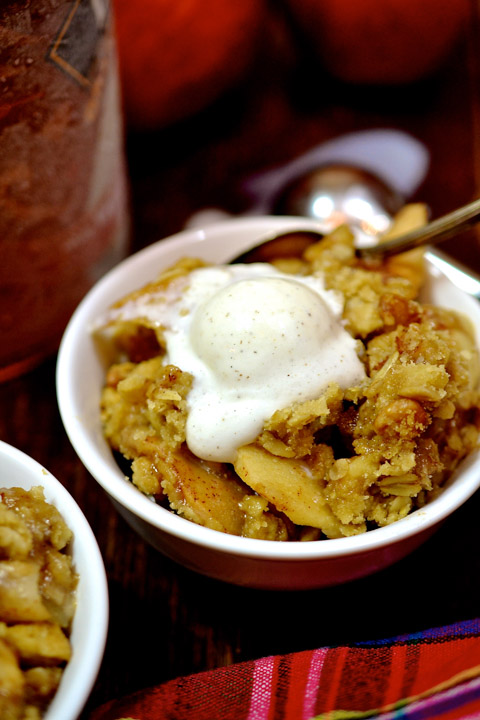
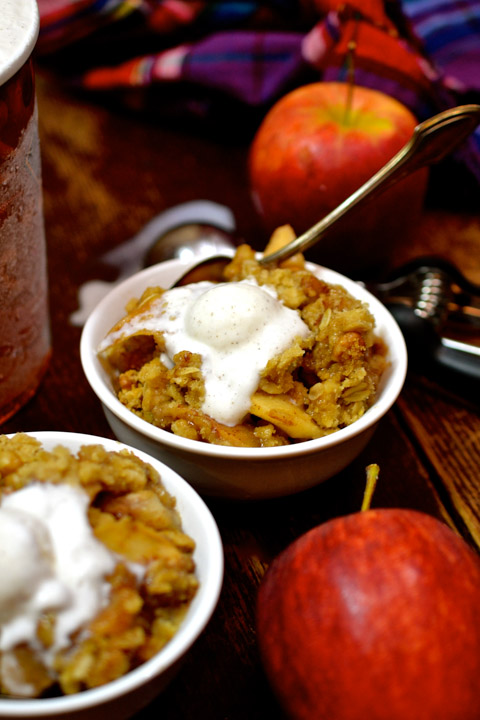
Apple Crisp with Walnuts
Every year we make apple pie for Thanksgiving. But that is about to change…
I was chatting with Chels the other day and we unanimously decided that this year we’re going with the Apple Crisp. And I’m pretty certain that Dom, Lauren and Nick will not mind one bit.
We decided that since we’re changing things up this year, meaning that rather than our chickies coming home, we’re bringing Thanksgiving to them, it seems apropos that we get a little daring with the rest of it. We’ll still have our classics, but it will be fun to try some new sides and desserts. So…along with our traditional apple-sausage stuffing, sweet potato casserole and other long-standing favorites, this Apple Crisp will be making the journey over the river and through the woods to Beantown, too.
I know…I’m acting like I’m switching out the turkey for hotdogs…I mean the crisp isn’t all that different from the pie, however, when you’re accustomed to doing things a certain way in the name of tradition, even removing a crust feels like a big deal. But – not for nothin’ – along with adding a little whimsy, it will make for easier traveling.
This is such a fun, simple dessert to create.
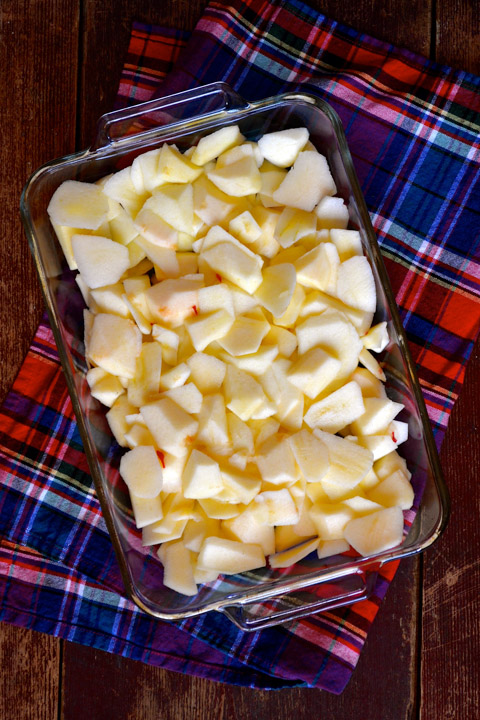
Begin by slicing up your apples and placing them in a 9×13 pan.
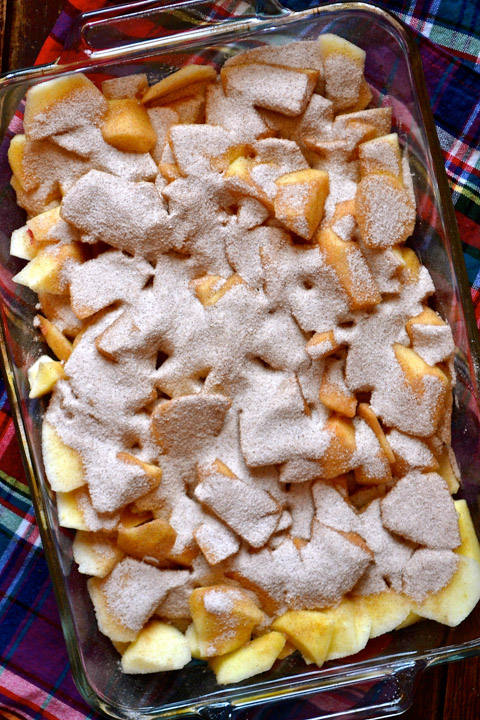
Next, sprinkle the apples with a mixture of white sugar and cinnamon.
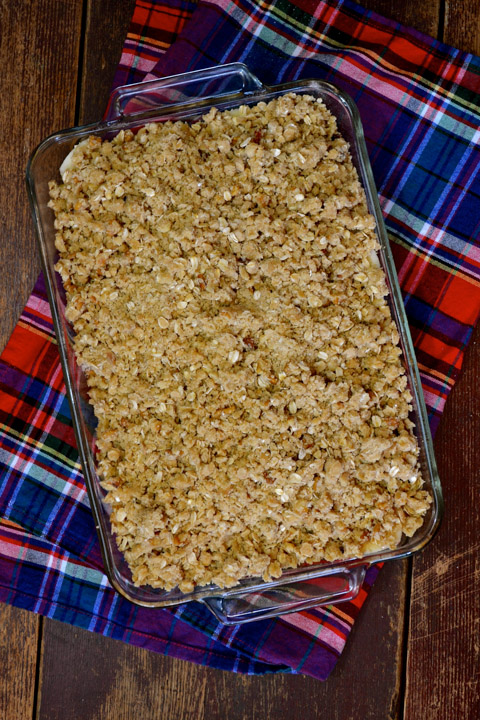
Then, combine oats, flour, brown sugar, baking powder, baking soda, melted butter and walnuts and crumble evenly over the apple mixture.
Bake at 350 degrees for 40 minutes and serve with vanilla ice cream.
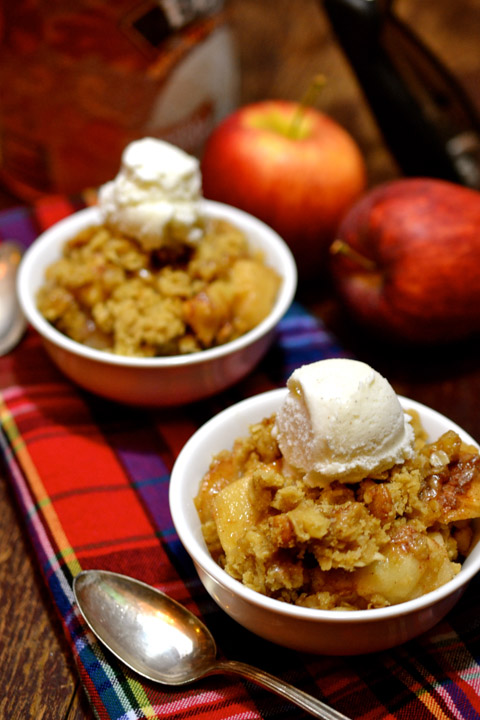

Oh yeah! That’s what I’m talking’ about…
This is not going to be a problem…
So, if, you, too, are thinking about changing things up this year, and you want to start with baby steps – this is a good one!
Buon Appetito!
Print
Apple Crisp with Walnuts
- Category: Dessert
Ingredients
- 10 firm, sweet apples, peeled, cored and sliced.
- 3/4 cup white sugar
- 1 3/4 tsp. ground cinnamon
- 2 cups quick-cooking oats
- 2 cups all-purpose flour
- 2 cups packed brown sugar
- 1/2 tsp. baking powder
- 1/2 tsp. baking soda
- 1 cup butter, melted
- 1 cup chopped walnuts (optional)
Instructions
- Preheat oven to 350 degrees.
- Place the sliced apples in a 9×13 inch pan.
- In a separate bowl, mix the white sugar and cinnamon together and sprinkle over the apples.
- For the topping combine the oats, flour, brown sugar, baking powder, baking soda, melted butter and walnuts.
- Crumble evenly over the apple mixture.
- Bake for 40 minutes.
- Serve with vanilla ice cream.
{Recipe adapted from Allrecipes}
Ciao!

Concord Grape Pie
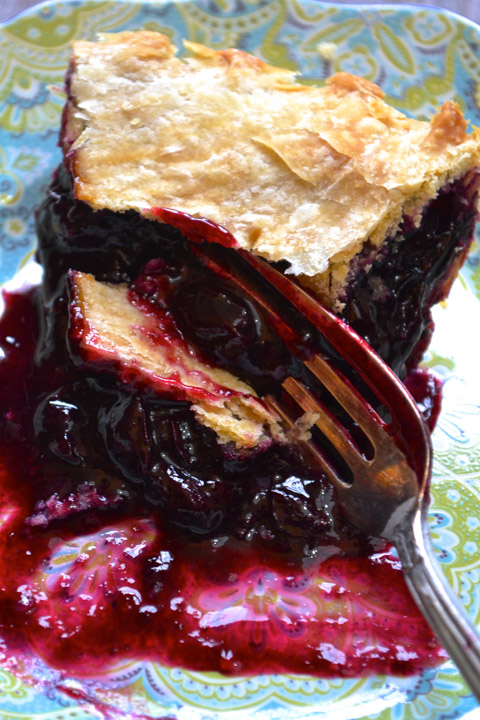
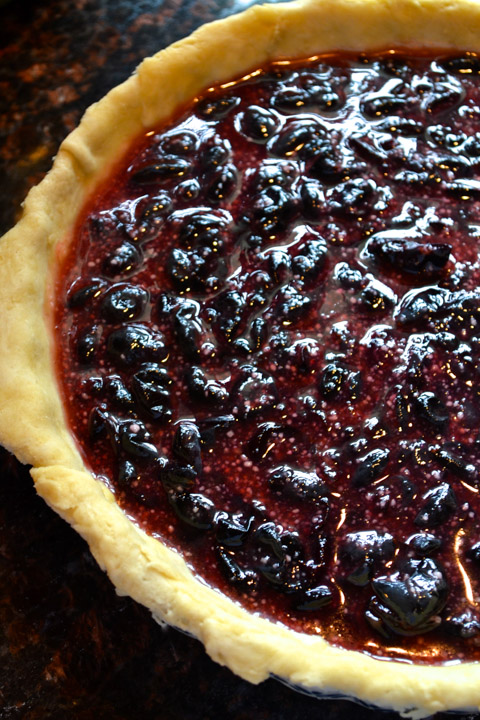
BOOM!
A little too assertive? I know – but I just can’t help myself! I wanted you to get up close and personal with this pie right out of the gate! You’re gonna love this!!!
Oh man, can I just tell you? I had the best day making this pie…
My dear friend and neighbor of 14 years shared her amazing recipe for Concord Grape Pie and even took time to hang in my kitchen and make it with me. Such a treat.
You know…girlfriends are like frosting on the cake of life. They make everything sweeter.
Karen and I have shared the privilege of watching each others’ kids grow up…we laugh at the same stuff, are moved by the same stuff, and have a ball when we’re together.
Karen is my wine buddy, my book buddy and the friend who, regardless of how long we might go without seeing each other, will pick up where we left off, as if it were yesterday.
We need these people in our lives. People who help create our happy memories. People who flesh out our history, who give us fun things to look forward to, but who can also stand in our kitchen and roll dough without needing to say a word… I love that. I am very blessed to call Karen my friend.
And when you try this pie…you’ll want her to be your friend, too!
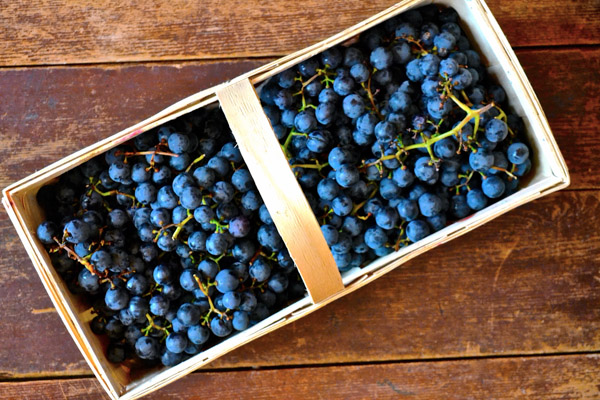
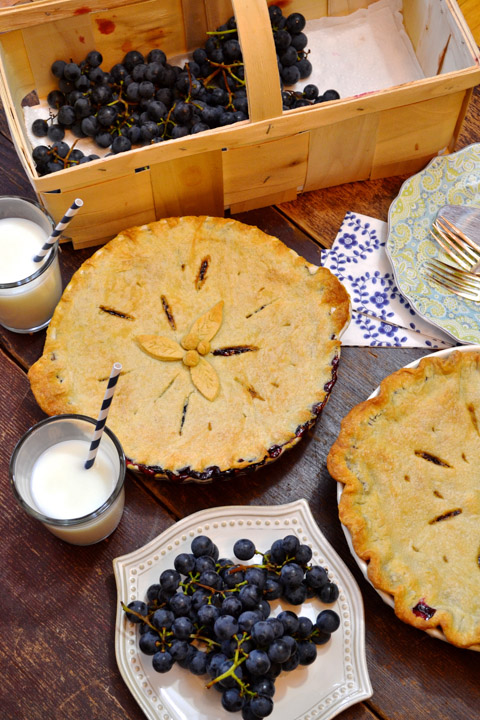
Karen arrived with a basket of rinsed ripened concord grapes. Together we removed the grapes from the stems, discarding any that were inedible. From there, I was along for a ride that you’ll soon discover was great fun from start to finish…
To begin you’ll pinch each grape into a small pot so that the (inner) pulp pops out. Unlike the skins that are very dark purple, almost black, the pulp is green.
Once you pop the pulp out, retain the skins in a separate bowl that you’ll use a little bit later. Just so we’re clear – at this point, we have two vessels in front of us – one pot filled with pulp and a bowl filled with skins.
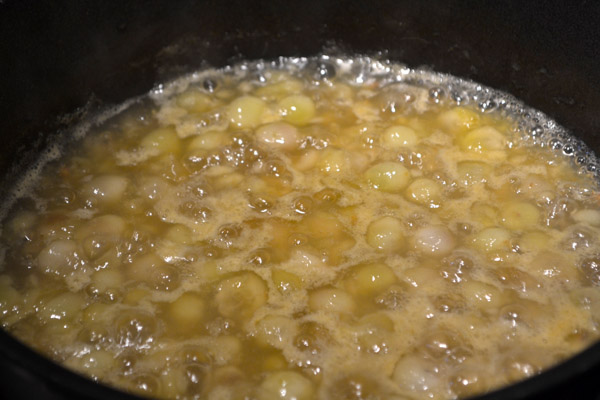
Next, bring the pulp to a rolling boil and let it go for about 5 minutes. All sorts of important things will happen in this 5 minutes…the fibers in the pulp break down releasing their grip on the seeds as well as to release some pectin that will ultimately help the pie-filling hold together. You might see a little foam on the top, that’s okay. Stir every few minutes while it’s boiling to keep it from burning.
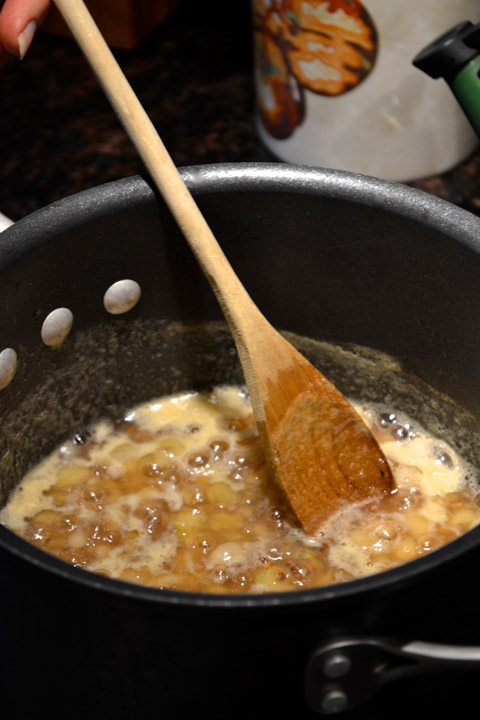
Once the pulp is cooked down and still hot, remove the seeds by pressing the pulp through a sieve, using the back of a ladle, straight into the bowl of skins.
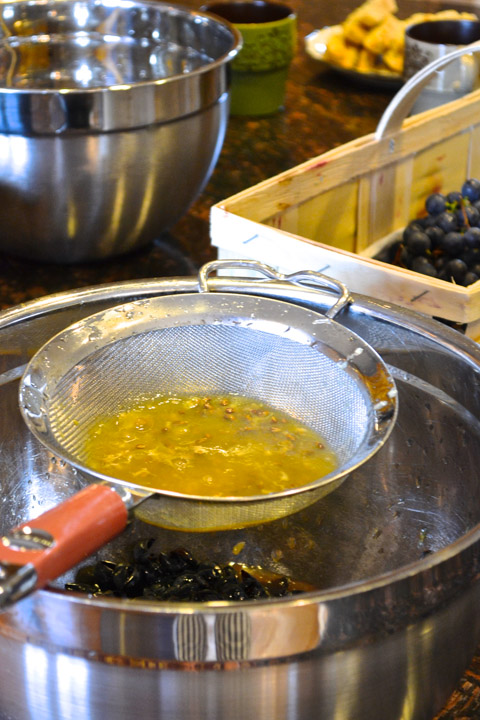
Add sugar, instant or minute tapioca (we used minute) and lemon juice then stir until fully combined. Allow the mixture to sit for up to 2 hours enabling the juices to extract maximum color from the skins as well as to allow the tapioca to absorb more of the juices. This is a good time to make the crust.
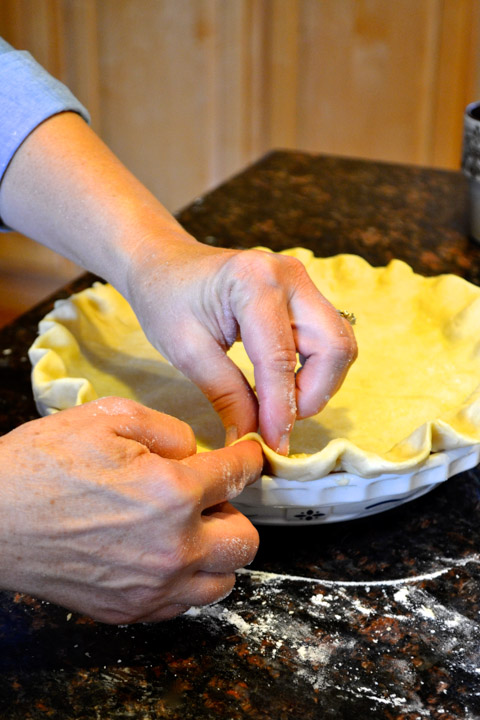
I had the dough ready to go and chilling in the refrigerator so all we had to do was roll and place in our pie plates.
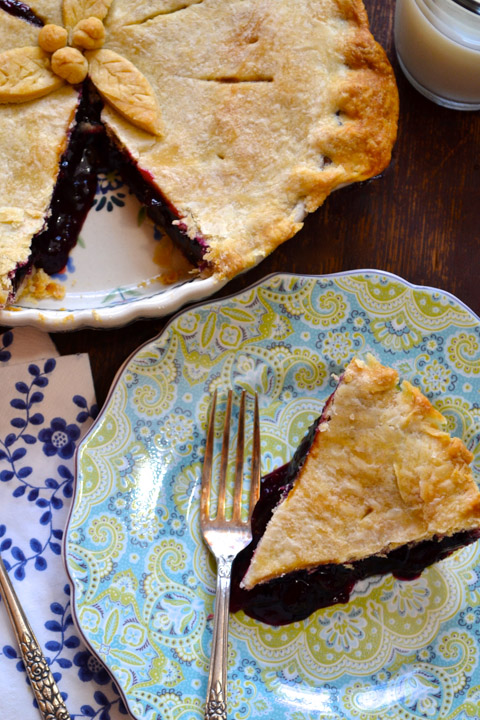
Once the filling is set and the dough is ready, pour the mixture into the crust. Notice that amazing color…I can’t get over it. It’s gorgeous.
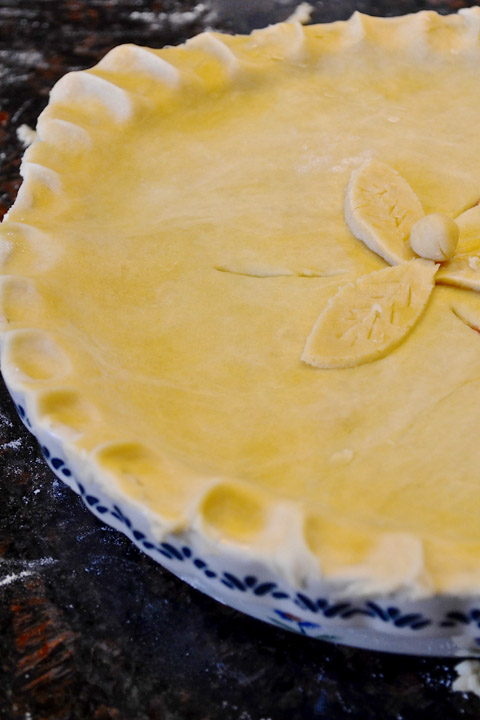
From there you’ll cover the filling with the top crust. You can design that any way you’d like. Lattice or a full crimped crust, just be sure to prick the top near the center 5 or 6 times with a knife to allow for steam to escape.
Karen’s…
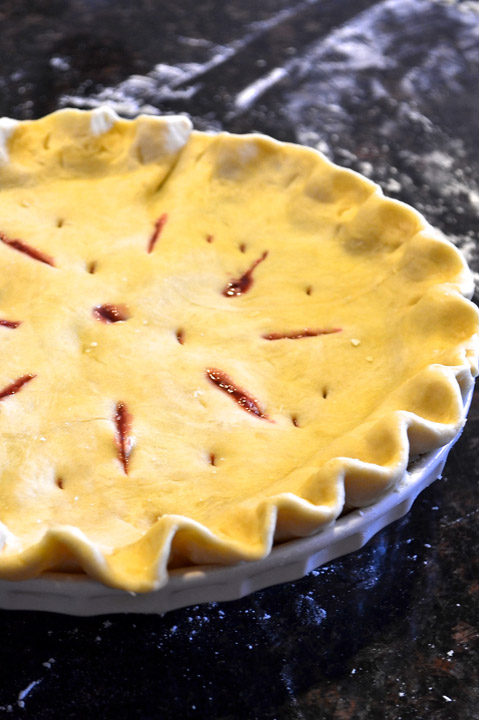
Mine…
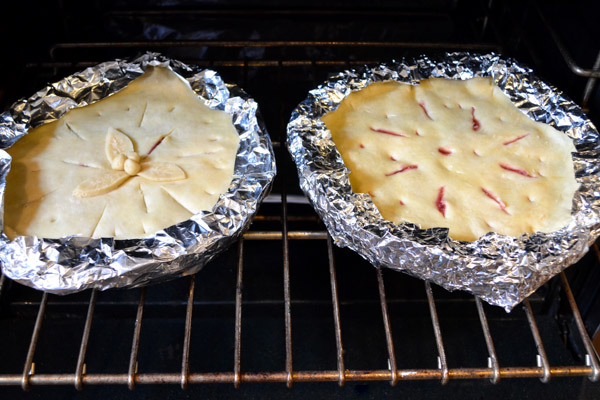
Karen shared a practical tip for shielding the edges to keep them from over-browning. We stapled 3 narrow pieces of tinfoil together then folded them over the edge. Just be sure to remove the shield 15 minutes prior to the end of baking time.
Place in a 425 degree oven for 15 minutes then lower to 400 for another 40 minutes. You’ll know it’s ready when the crust is browned and grape juice begins to peek through the slits on top.
Voilà!
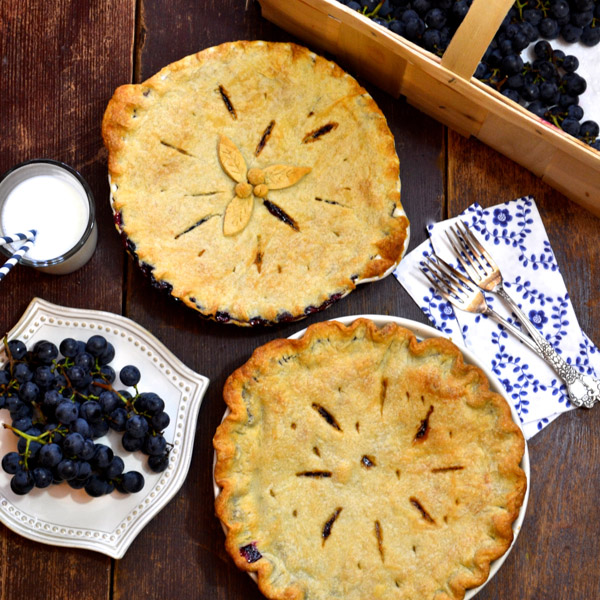
You can serve it warm with a scoop of vanilla ice cream or enjoy it all on its own with a cold glass of milk…
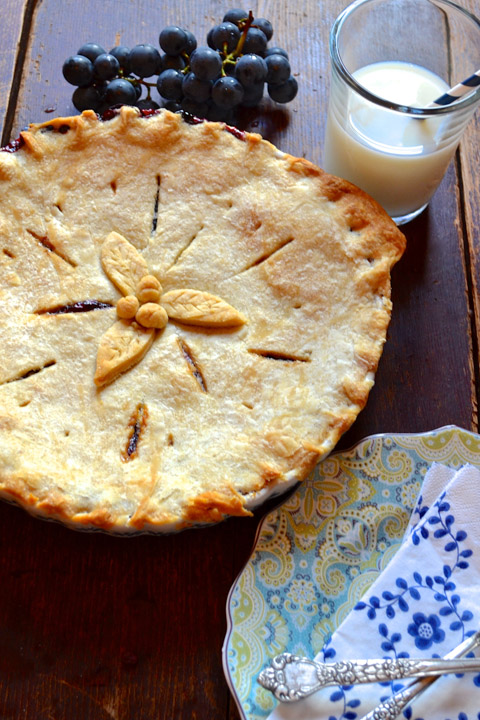
Oh yeah…that’s what I’m talking about!
Concord Grape Pie is the perfect dessert to make someone feel special!
Such a great day! And such a lovely dessert!
Have fun with this one!
Buon Appetito!
Print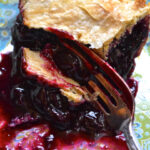
Concord Grape Pie
- Category: Dessert
Ingredients
- 5 1/2 cups ripe concord grapes
- 2/3 cup sugar
- 1/3 cup minute tapioca
- 1 Tbsp. fresh lemon juice
- 1 two-part pie crust
Instructions
- Rinse the grapes and pat them dry.
- Remove them from the stems and discard any that are green, hard, rotten or moldy.
- Pinch each grape into a small pot so the pulp pops out.
- Put the skins in a separate bowl.
- Bring the pulp to a rolling boil for about 5 minutes.
- Stir every few minutes while boiling to make sure it doesn’t burn.
- While the pulp is hot, remove the seeds by pressing the pulp through a sieve (using the back of a ladle) into the bowl of skins.
- In a small bowl combine the sugar with the tapioca then add it to the pulp mixture.
- Add the lemon juice.
- Stir and let rest for up to two hours.
- Prepare crust.
- Preheat oven to 425 degrees.
- Put the bottom crust into pie plate and fill with grape mixture.
- Cover the filling with top crust.
- Prick the top near the center 5 or 6 times with a knife to allow steam to escape.
- If you have a pie shield for the edges, now is the time to put it on.
- Place pie on the center rack.
- Put a piece of foil on the bottom rack to catch drips.
- Bake at 425 for 15 minutes, lower the temperature to 400 and bake for another 40 minutes (remembering to remove shield 15 minutes prior to end time).
- The crust will be golden brown and grape juice will appear through the cuts in the top crust.
- Let cool for 2 hours.
{Recipe adapted from Irene Bouchard.}
Ciao!
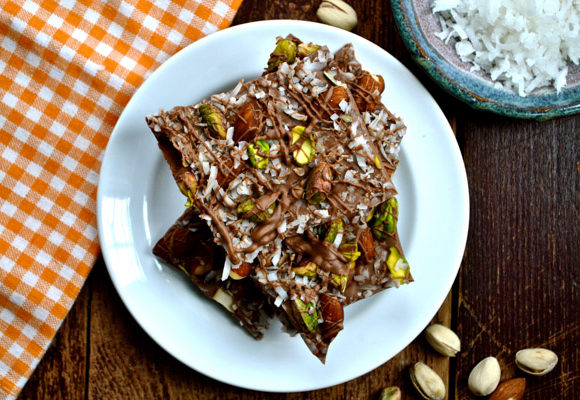
Almond, Pistachio & Coconut Chocolate Bark
Hubby has taken the concept of bunnies multiplying to a whole new level…
Once he discovered that Gertrude Hawk Chocolates sells broken bunnies at discounted prices – broken chocolate bunnies have multiplied in my pantry!
What’s a girl to do?
Make chocolate bark, of course!
We went through a spell last year where the bunnies contributed to chocolate dipped pretzels – this year – it’s all about the bark.
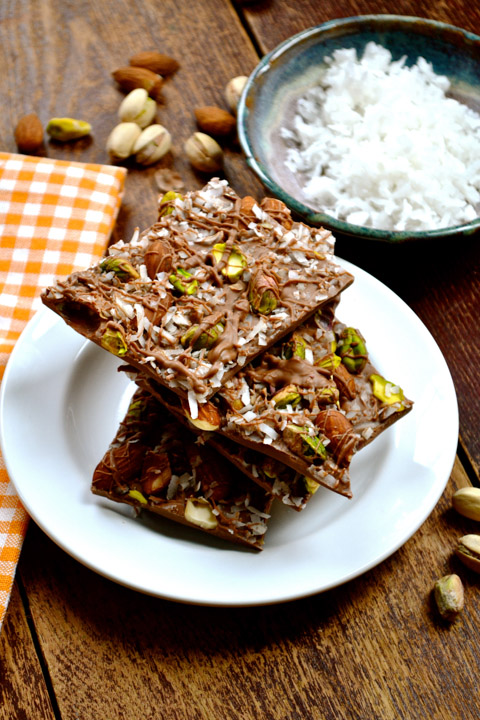
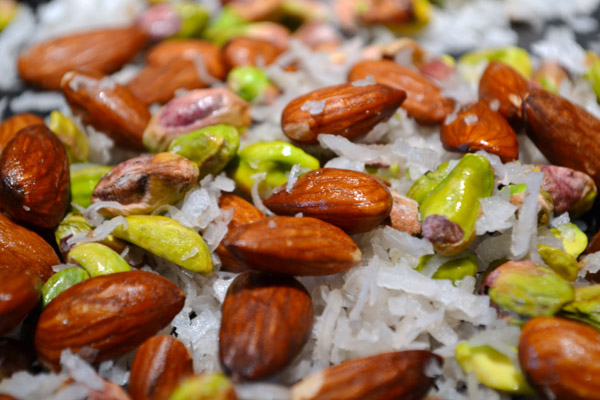
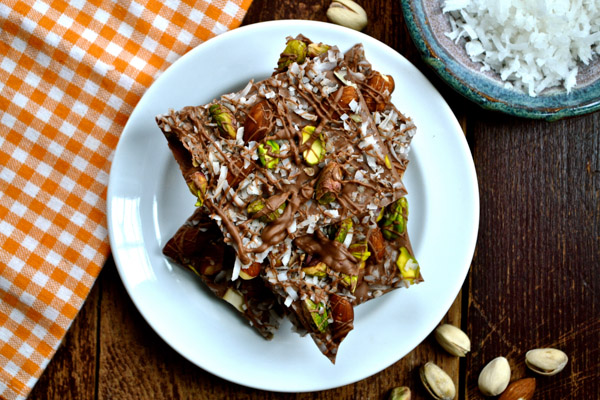
Toasted Almond, Pistachio & Coconut Chocolate Bark with Sea Salt, to be exact.
This recipe is conducive to mindful moments; case-in-point: to crack open the pistachio shell and focus only on the act of cracking, to listen to the sound of the shell break, the nut fall to the counter, and the occasional crunch of the nut you’ll undoubtedly eat (if you’re anything like I am)…is a pleasing endeavor. And don’t even get me started on pouring the melted chocolate onto the parchment…My yogi would be proud…
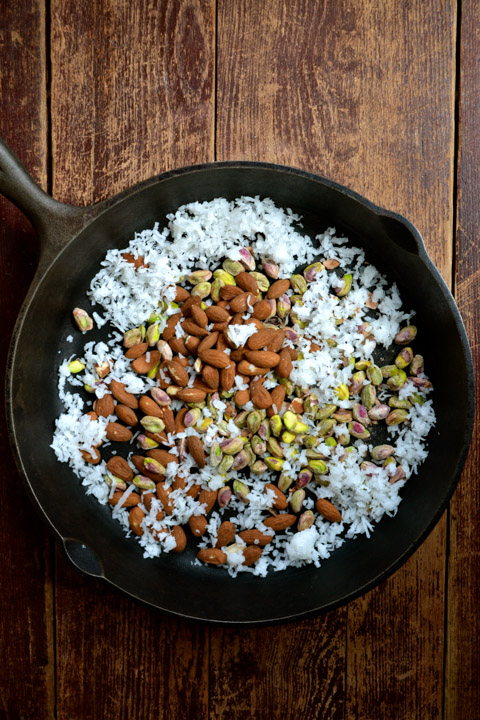
Combine a thin layer of milk chocolate with a topping of almonds, pistachios and flaked coconut that have been toasted on the stove for four minutes or so – just enough time to release the oils and aromas and to brown the coconut just a bit.
Once the toppings are securely nestled in the melted chocolate, shower it with one more drizzle, add a shake of flaked sea salt and deliver it to the refrigerator to firm up until you’re ready to enjoy.
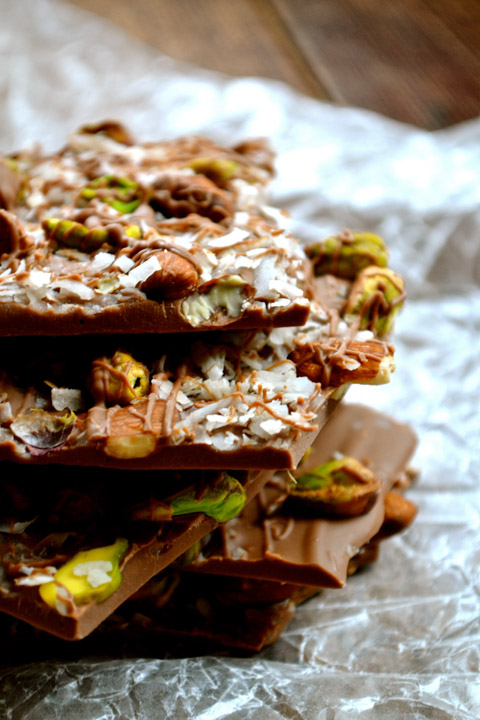
I mean… is there anything better than the combination of sweet and salty? I think not.
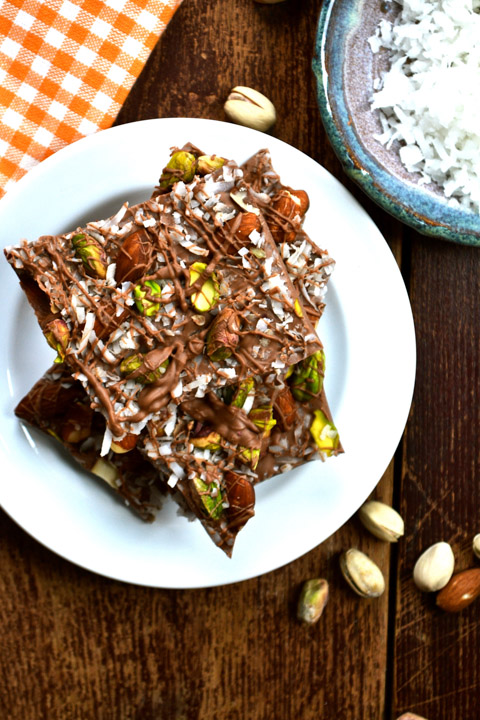
So my friends, please keep in mind that it is not only the flavor of this decadent chocolatey treat but also the experience of creating this bark that is delicious and gratifying on so many levels…
It’s worth the short time it takes to make this salty-sweet indulgence.
Buon Appetito!
Print
Almond, Pistachio & Coconut Chocolate Bark
- Category: Dessert
Description
Almond, Pistachio & Coconut Chocolate Bark makes for the perfect salty-sweet indulgence!
Ingredients
- 2/3 cup shelled pistachios
- 2/3 cup whole, raw almonds
- 2/3 cup flaked coconut
- 15 oz. milk chocolate
- 1/2 tsp. flaked sea salt
Instructions
- Toast pistachios, almonds and coconut on the stove top for about four minutes until fragrant.
- Let cool completely.
- Fill a medium saucepan with 1 inch of water and bring to a simmer over medium heat.
- Set a large heatproof bowl atop the saucepan, making sure water doesn’t touch the bottom of bowl.
- Place chocolate in bowl; stir until smooth.
- Remove bowl from saucepan.
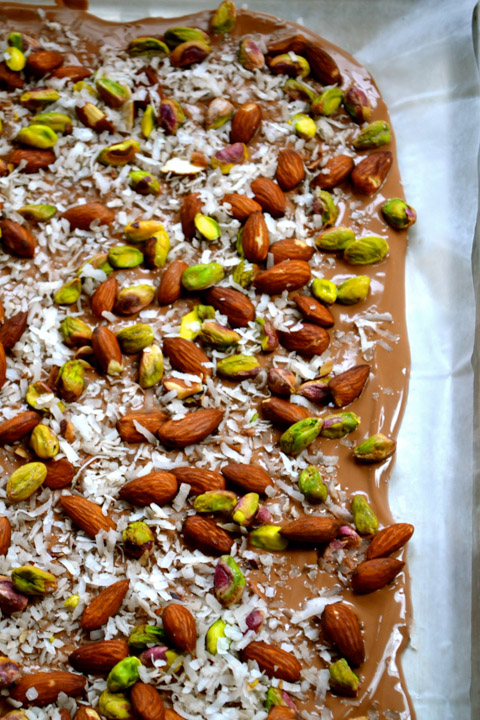
- Pour melted chocolate on piece of parchment that sits on an 11×14 sheet pan.
- Spread chocolate into an even layer.
- Sprinkle nuts and coconut over top.
- Drizzle with a little more melted chocolate.
- Give a shake of sea salt.
- Refrigerate until firm, 1 hour.
- Break into pieces.
Ciao!
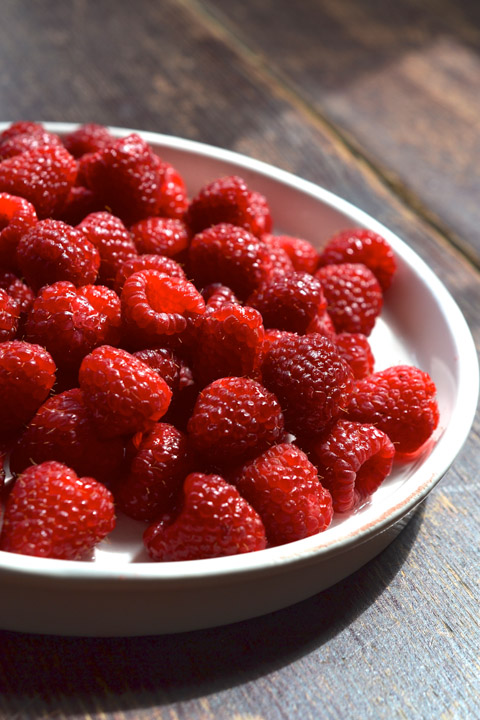
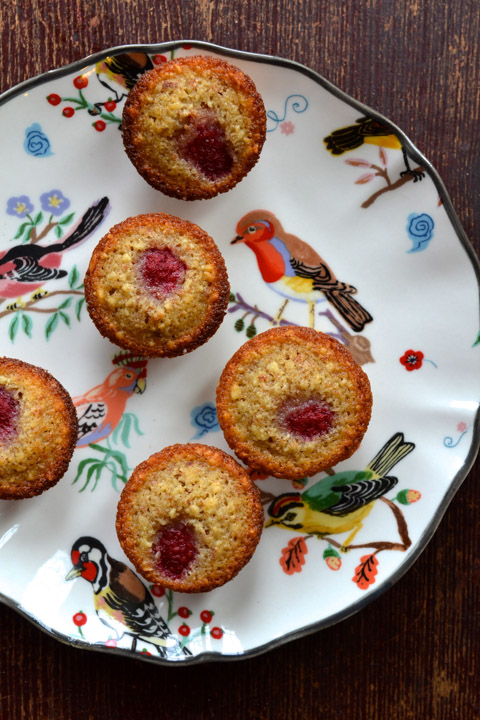
Mini Almond Cakes with a Raspberry Button
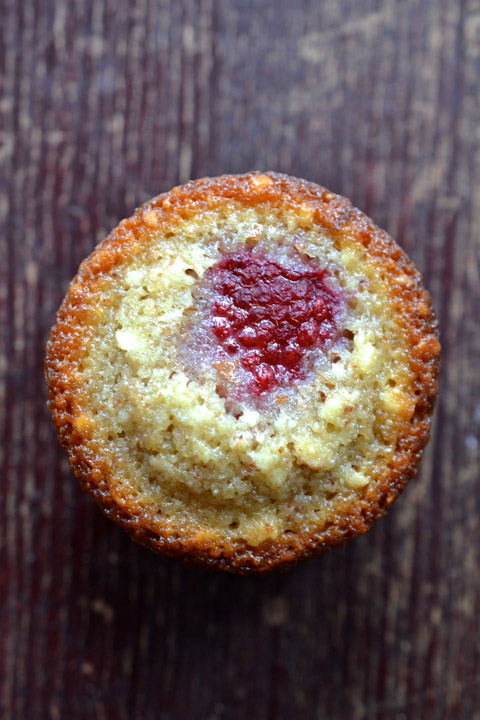
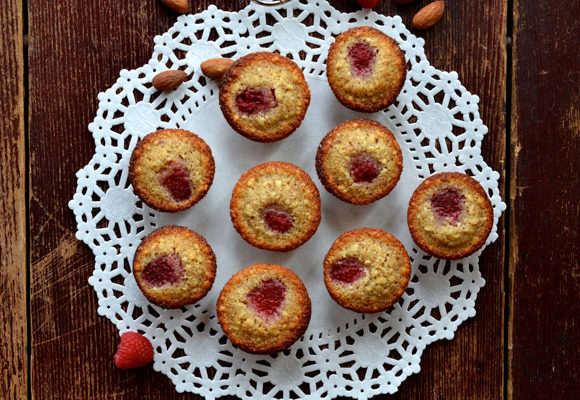
So, I’m nearing the end of the luscious memoir, Lunch in Paris: A Love Story, with Recipes by Elizabeth Bard, and regardless of how near I get to the final word on the final page 314, my mind keeps drifting back to page 87. It’s here that Elizabeth shares the recipe for Mini Almond Cakes with a Raspberry Button aka Financiers aux Framboises.
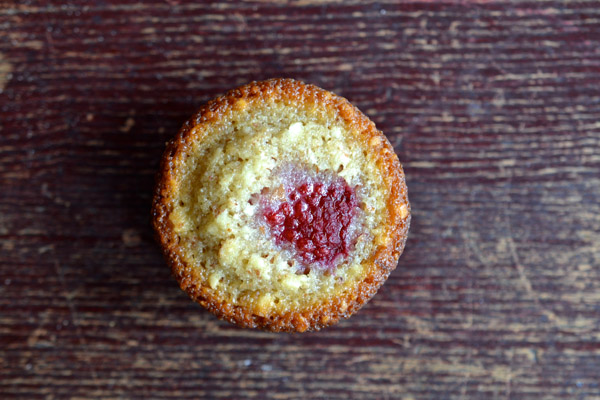
With the exquisite picture she paints through her use of pleasing dialogue and sumptuous superlatives, it was the following sentence that Elizabeth wrote that caught my attention and would not let go, “With a raspberry in the center and crisp golden edges, these little cakes are pretty enough for a pâtisserie window.”
What? Wowww! Really?
I had to go for it…I had to see if it’s true that I might be able to create something so pretty and delicious that it would possess the qualities required to meet the high standards of a Parisian window.
What do you think?
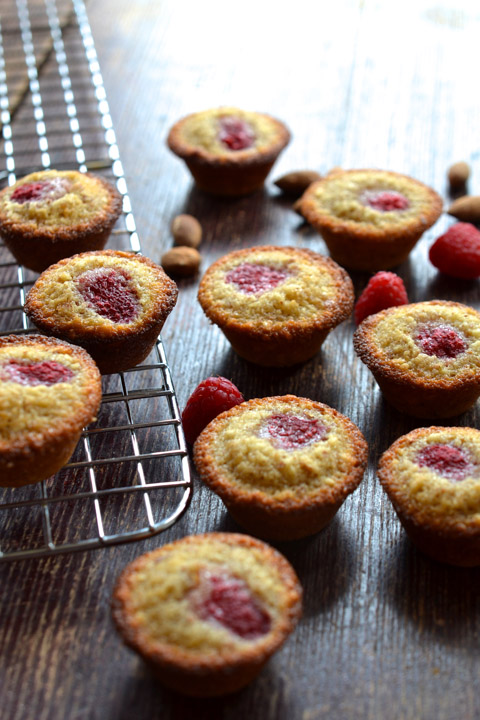
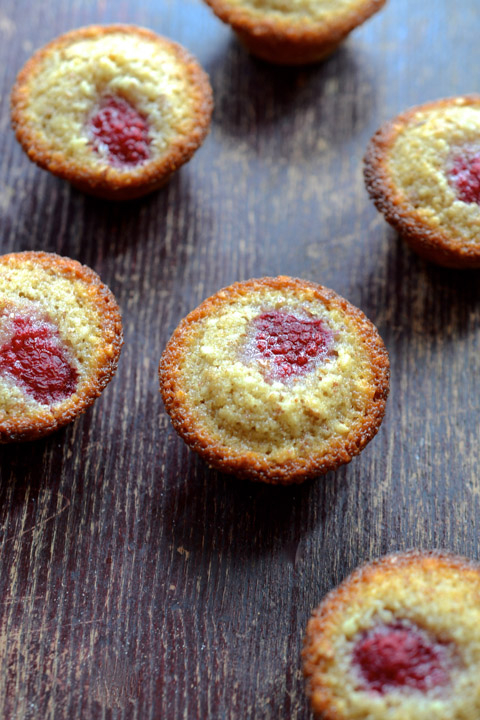
I think they’re beautiful…but what is more striking about these almond raspberry babies is their immense flavor. If this is any indication of just how dangerously delicious these confections are – I could have eaten the batter for dessert and skipped the whole 20 minute bake and cool time.
The batter is divine, people! How often can you say that about batter? It is exquisite and elegant and my mouth is watering just thinking about it. So imagine the finished cake…tender on the inside with just the right amount of buttery, crisp, golden delightfulness on the outside.
You know, we’ve all heard it – but it’s true…the French know their way around a kitchen. (You can quote me.)

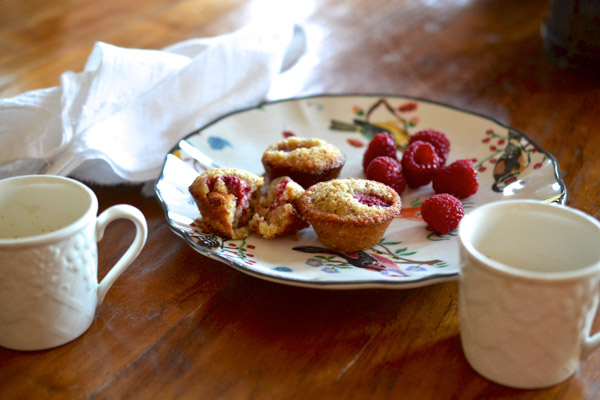
Elizabeth and Gwendal, her soon-to-be fiancé, enjoyed the mini cakes as the sun was fading during a romantic picnic. My experience with the financiers was very different but incredibly special just the same.
Nick scooted home between classes to pick up a few things he needed – so we got to share some unexpected time together; we did so over a few financiers and a shot of caramel flavored espresso. We caught up on his first couple days of classes, life in the new dorm with his new roommates and how great it feels to no longer be ‘one of the new guys’ on the team. And although I made many attempts to cook him a quick lunch before returning to campus, he was happy to partake in mini cakes with mama as he was still full from breakfast. 🙂
He loved it(!) mainly because it was full of flavor without being cloyingly sweet. And according to Nick, that’s a perfect treat.
I followed the recipe to the letter and it was everything I dreamed it would be…and now I can finish the book without the distraction of page 87.
If your plans for the Labor Day weekend include a lot of down time, and the thought of escaping to Paris appeals to you, check out Elizabeth’s book – it’s a beauty.
Bon Appetit!
Print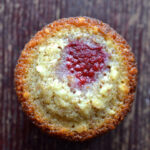
Mini Almond Cakes with a Raspberry Button
- Category: Dessert
Description
Mini Almond Cakes with a Raspberry Button are pretty enough for a pâtisserie window.
Ingredients
- 1/2 cup turbinado (raw) sugar
- 3/4 cup plus 2 Tbsp. ground almonds
- 1/3 cup flour
- 10 Tbsp. unsalted butter, melted
- 4 egg whites
- a pinch of salt
- 1 egg yolk
- 1/2 tsp. vanilla extract
- 1/2 pint raspberries
Instructions
- Preheat oven to 450 degrees.
- Pulse the sugar in a blender or food processor to obtain a fine powder.
- Combine with ground almonds and flour.
- Melt the butter over gentle heat; let cool.
- Whip the egg whites and salt into what the French call a mousse, just till they’re frothy, about 10 seconds. Stop when you have liquid underneath and bubble bath-like foam on top.
- Gently fold the egg whites into the dry ingredients.
- Fold in the egg yolk and vanilla.
- Then add the melted butter.
- Continue folding the ingredients until they are fully incorporated. (Don’t panic with the butter – it will look like a flood – just keep folding.)
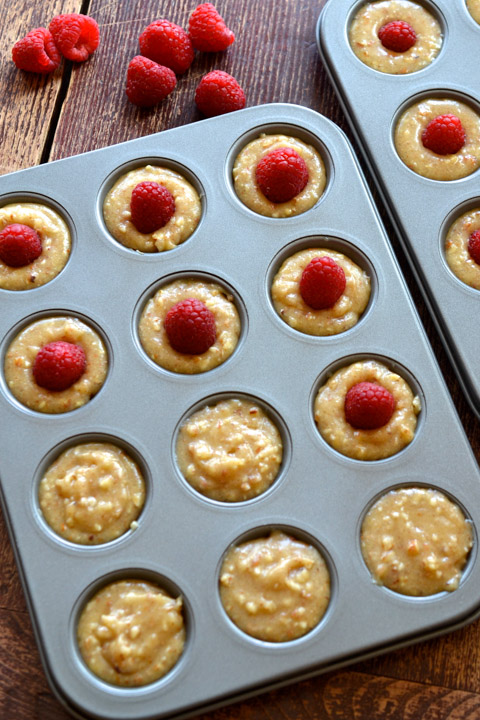
- Spoon large, drippy tablespoons of batter into nonstick mini muffin tins.
- Gently place a raspberry in the center of each financier.
- Don’t push it too far, or it will sink completely during baking.
- Bake in the center rack for 10 to 11 minutes, until the edges are crisp and golden.
- Let them cool for 10 minutes in the pan.
- Transfer to a wire rack to cool completely.
Ciao!
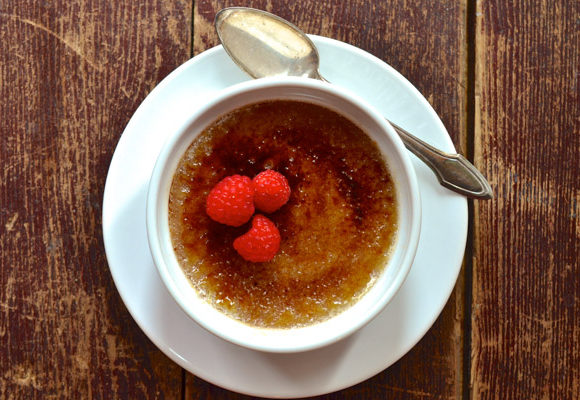
Chocolate Hazelnut Crème Brulée

Are you having company this weekend? No? It doesn’t matter. Make this Chocolate Hazelnut Crème Brulée and treat yourself as you would treat your treasured guest.
…
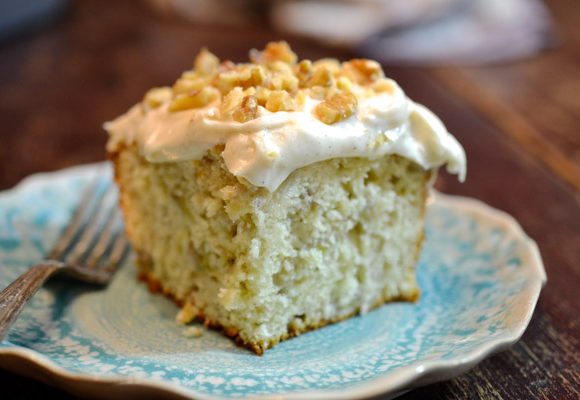
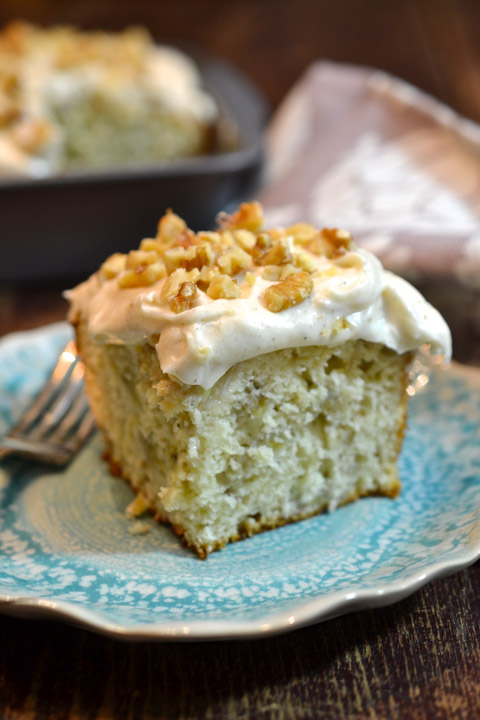
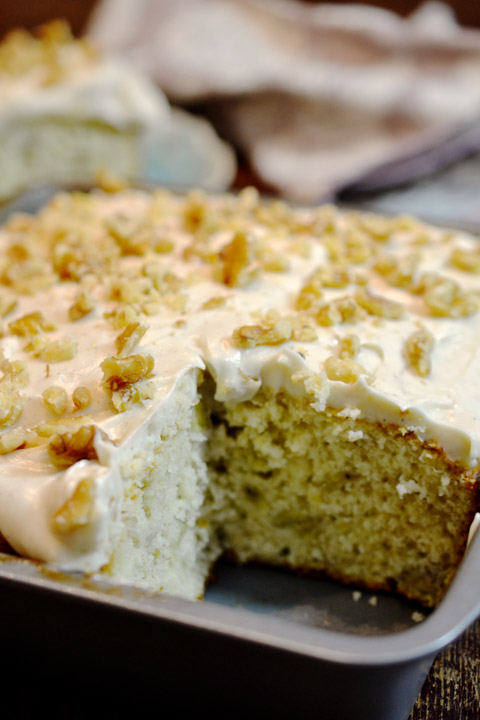
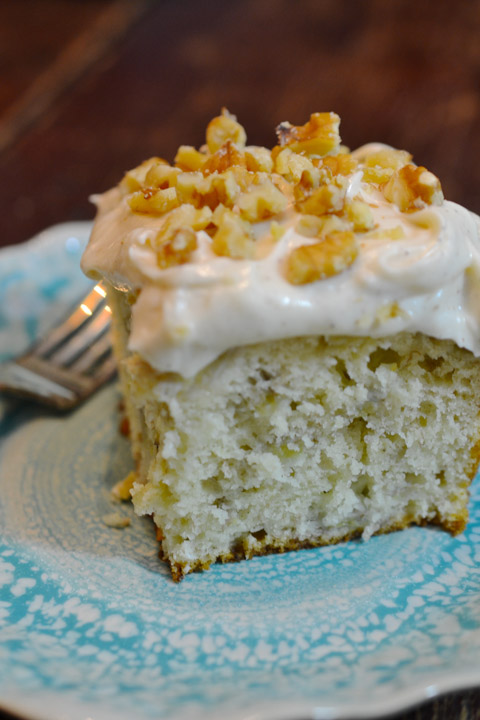
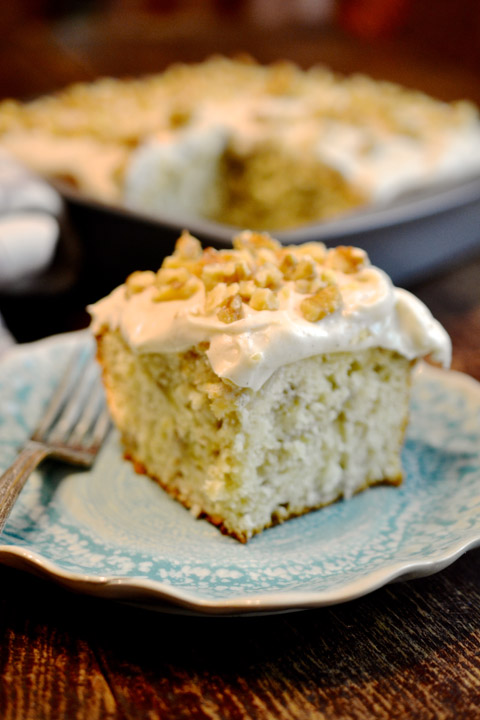
Banana Cake with Cinnamon Cream Cheese Frosting
In case you were wondering – we’ve eaten a lot of cake this month.
And it’s not over yet!
We’ve already celebrated Chelsea’s birthday, and Nick’s birthday is this Sunday, along with Father’s Day, making our mantra for the month – Cake, Cake and more Cake.
And believe it or not, we’re this lucky twice a year. April is also full of milestones…two birthdays and an anniversary. And as much as we love all the celebrating, we thank God for May – or we would suffer sugar shock. I’m certain of it. Without those 31 days to rest before ‘the next’, I don’t think we could go the distance…except for maybe Dom. My big guy likes his sweets.
As I pondered what to make this weekend, a lovely bunch of very ripe bananas caught my eye. And the decision was made…Banana Cake with Cinnamon Cream Cheese Frosting. De-lish. Perspective is everything, isn’t it? I wouldn’t normally call coffee-colored bananas beautiful but they were exactly what I needed.
This cake, made in an 8 inch square pan is perfect. If you like cake with a perfect crumb, blanketed in a cinnamony-sweet frosting, you’re going to love this. It is what yummy is all about.
I’m excited to make something sweet and special for my two guys who just so happen to go by that very same description. Sweet & Special.
It was 19 years ago, on Father’s Day, that we brought Nick home from the hospital, just 3 days old. Dominick was a beautiful papa to his two little girls and now he had a little boy to cherish too.
I have loved every minute of watching Dom, our gentle giant, raise and adore our kids. I tell you what – he is all man – but when he has the chance to play and explore and discover new things with his kids – he is always ready. Always. They keep him young, and he keeps me enamored.

So on this very special day…I wish all the dads a very Happy Father’s Day!
And all the folks celebrating a birthday…a very Happy Birthday!
And to our two best guys…a Happy, Happy Day! Your best girls love you!!
Banana Cake with Cinnamon Cream Cheese Frosting
- Category: Dessert
Description
Banana Cake with Cinnamon Cream Cheese Frosting is my favorite thing to use extra-ripe bananas for!
Ingredients
- 2 cups all-purpose flour
- 2 tsp. baking powder
- 1/2 tsp. salt
- 4 Tbsp. unsalted butter, room temperature
- 2 Tbsp. canola oil
- 3/4 cup granulated sugar
- 2 large eggs, room temperature
- 1 large egg white, room temperature
- 1 tsp. vanilla extract
- 4 large ripe bananas
- 1/4 cup milk
- 8 oz. cream cheese, room temperature
- 4 Tbsp. unsalted butter
- 1/2 Tbsp. vanilla
- 2 cups confectioners’ sugar
- 1/4 tsp. cinnamon
Instructions
- Preheat oven to 375 degrees.
- Spray 8×8 pan with cooking spray.
- Whisk together flour, baking powder and salt. Set aside.
- Using an electric mixer, beat butter, oil and sugar.
- Beat in eggs and egg white, one at a time, mixing well after each addition.
- Mix in vanilla.
- In a separate bowl, mash bananas with milk. Set aside.
- Gradually mix in half the dry ingredients into butter mixture.
- Mix in bananas.
- Mix in remaining dry ingredients.
- Pour cake batter into prepared baking pan.
- Bake for 35-40 minutes, or until toothpick inserted comes out clean.
- Cool cake in pan on wire rack.
- Using an electric mixer on medium speed, beat cream cheese, butter and vanilla.
- Reduce speed and gradually add confectioners’ sugar and cinnamon.
- Spread frosting on cake.
- Sprinkle with walnuts.
(*Recipe adapted from All You.)

Ciao!
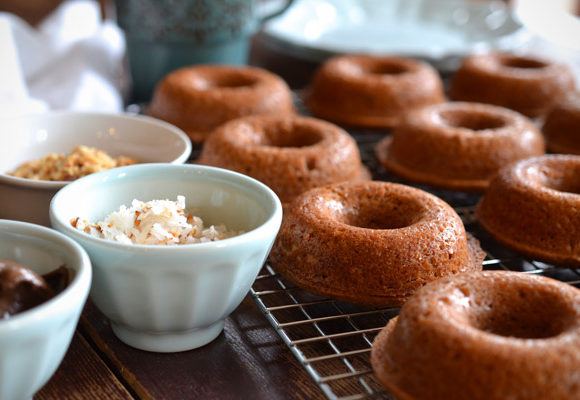
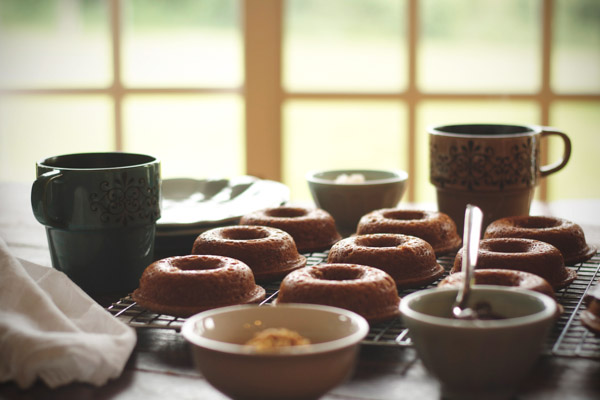
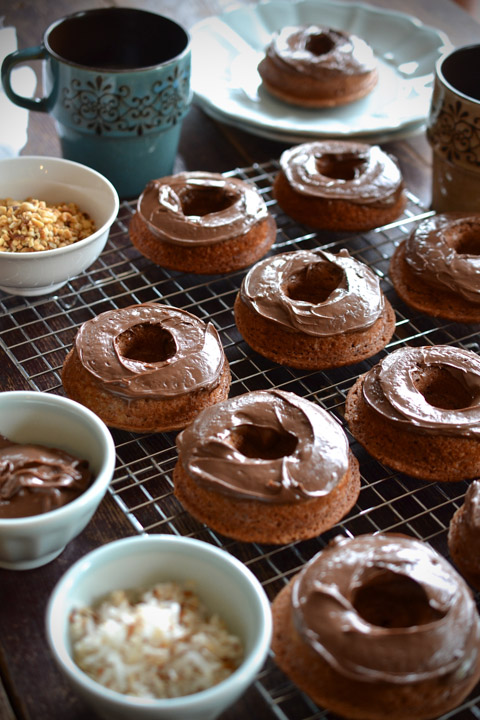
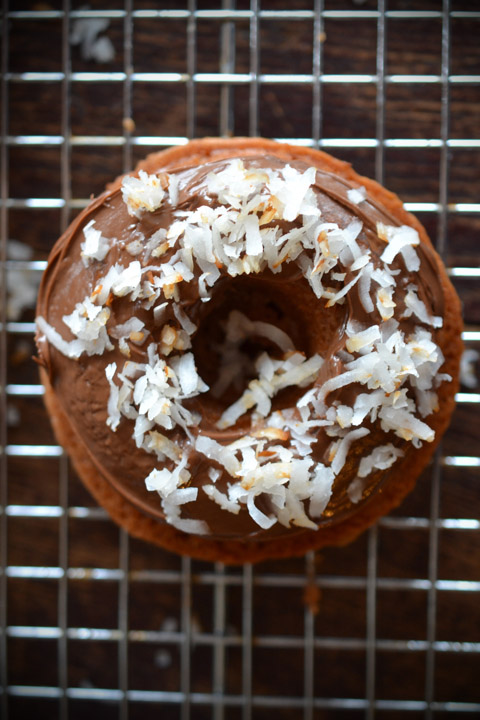
Nutella Doughnuts with Toasted Coconut
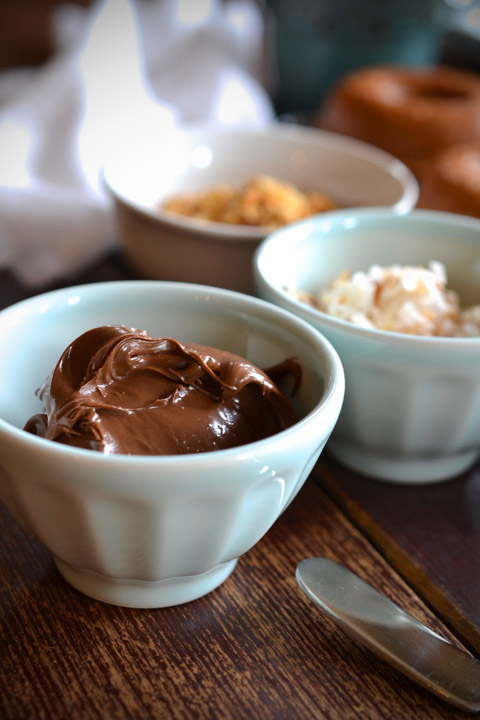
I’m always looking for an excuse to dive into a jar of Nutella.
And today we have one! This is legit, my friends!
It’s National Doughnut Day!
Yes! We get to partake in a tradition that started back in 1938. It was established by the Chicago Salvation Army to raise funds and to honor the work of the World War I Salvation Army Volunteers who made doughnuts and other foods for thousands of soldiers.*
Making this day a win-win. I mean, doughnuts with Nutella, toasted coconut and chopped nuts? As a result of a good cause? That works for me!
It doesn’t get any better.
I had fun playing with the ingredients for this sweet treat.
By using my basic recipe for baked doughnuts, I came up with a doughnut just as delectable as the original.
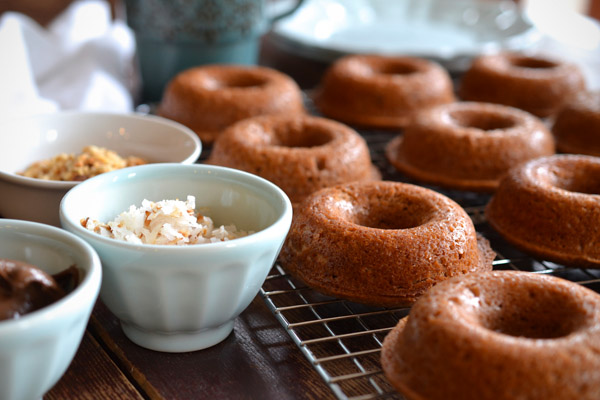
So get your pans…
Your mixing bowls…
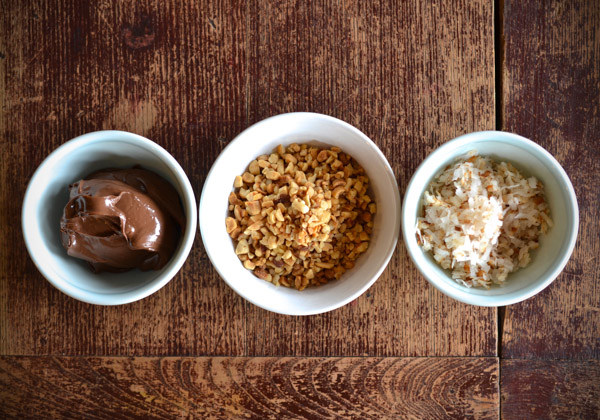
And your toppings…

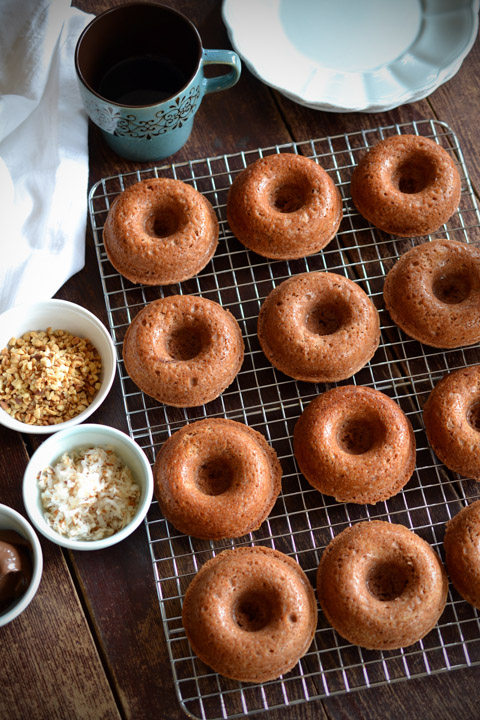
Throw in your favorite coffee mug…

And have yourself a moment…
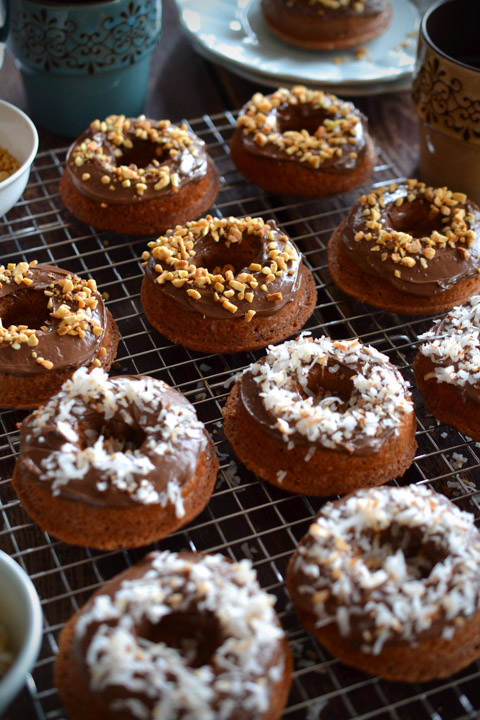
Nutella Doughnuts with Toasted Coconut are so good…they just might bring a tear to the eye!
Buon Appetito!
Print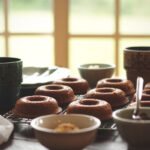
Nutella Doughnuts with Toasted Coconut
- Category: Dessert
Description
Nutella Doughnuts with Toasted Coconut are so good…they just might bring a tear to the eye!
Ingredients
- Baking spray
- 2 cups all-purpose flour
- 1 1/2 cups sugar
- 2 tsp. baking powder
- 1/2 tsp. kosher salt
- 1 extra large egg, lightly beaten
- 1 1/4 cups whole milk
- 2 Tbsp. unsalted butter, melted
- 2 tsp. pure almond extract
- 3/4 cup Nutella
- 1/2 cup shredded coconut, toasted for 5 minutes on stove top until just browned
- 1/2 cup chopped nuts
Instructions
- Preheat oven to 350 degrees. Spray 2 doughnut pans well.
- Into a large bowl, sift together the flour, sugar, baking powder and salt.
- In a small bowl, whisk together the egg, milk, melted butter and almond extract.
- Stir the wet mixture into the dry ingredients until just combined.
- Stir in 1/2 cup Nutella.
- Spoon the batter into the baking pans, filling each one to just full.
- Bake for 17 minutes, until a toothpick comes out clean.
- Allow to cool for 5 minutes., then tap doughnuts out onto a cooling rack.
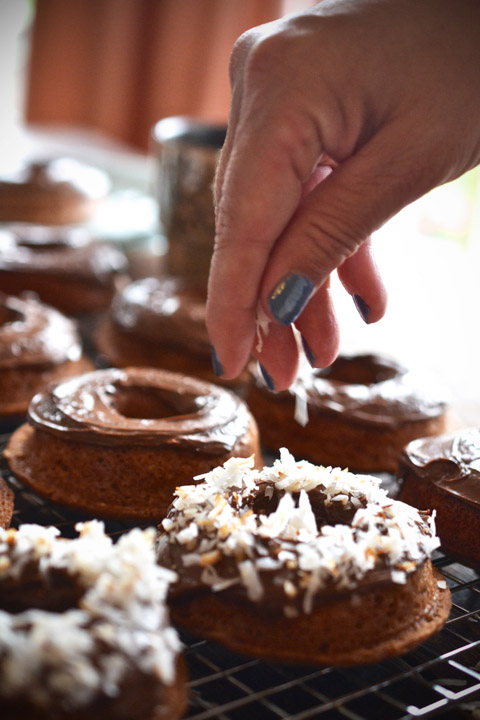
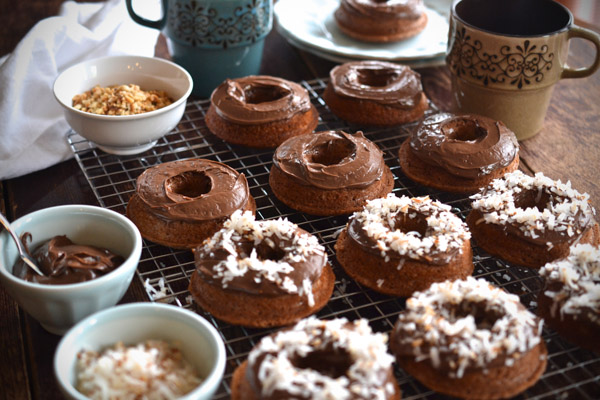
- For topping, frost doughnuts with remaining Nutella.
- Sprinkle with toasted coconut and chopped nuts.
(*Recipe adapted from Ciao Chow Bambina.)
Ciao!

Yellow Butter Cake with Chocolate Frosting
Some cakes make me want to dance.
Some songs make me want to dance.
Some days make me want to dance.
Do you have those days too? The ones that are impossible to describe because they’re too good to attach words or labels to…
Days when the only thing you can do is…eat cake…and dance…
Well, today, we have hit the jackpot!
Today, it’s all about DOM!
His 51st birthday.
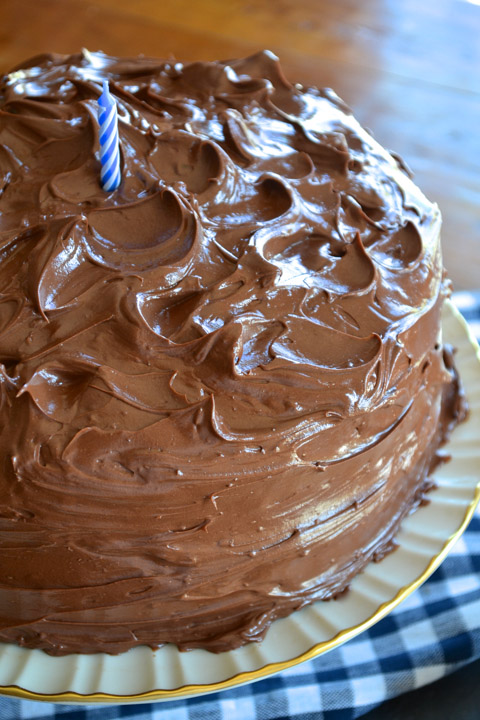
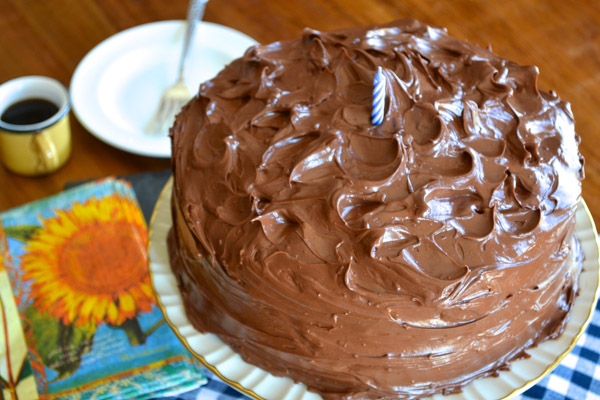
A yellow butter cake with chocolate frosting.
And Pharrell Williams.
Oh yeah!!!!
Doesn’t yellow cake with chocolate frosting just scream, “Happy Birthday”?

This all-American layer cake is one of Martha Stewart’s recipes. It comes from her Baking Handbook. I loved the idea of making Dom a classic cake with a dreamy, decadent frosting.
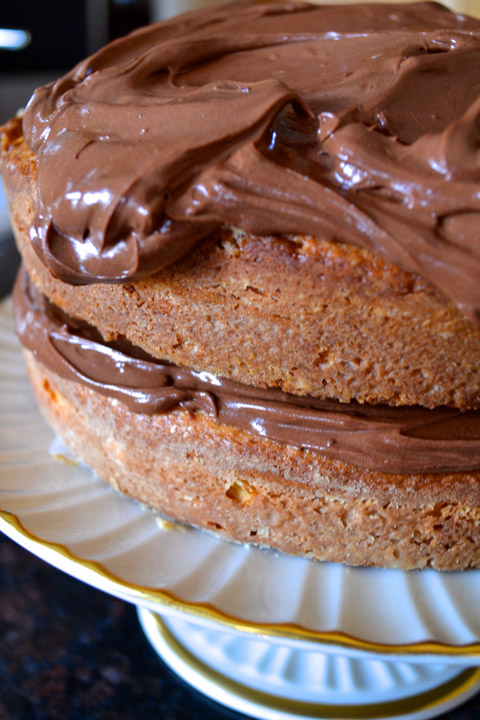
And Martha delivers! I will give you one note of advice – make sure not to overbeat your batter – it can become a little tough. Perhaps I know a little something about this. 😉 Once you add the flour to the egg and butter mixture, beat until just combined. This will leave your cake fluffy and moist.
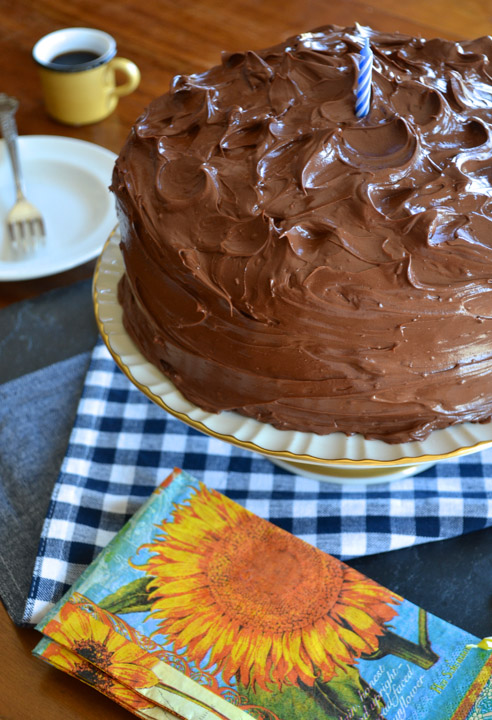
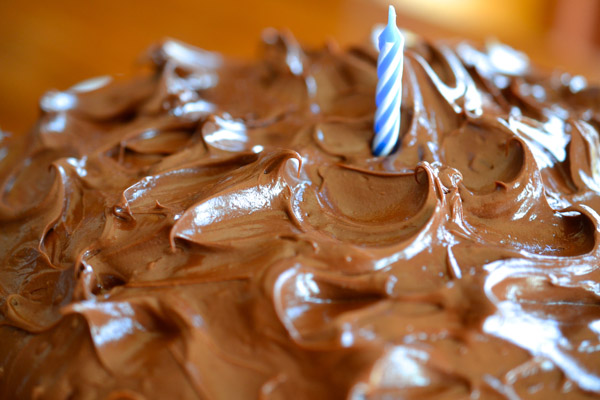
And what can I say about this frosting that will inspire you to get out of your chair and run to the store right now for the ingredients? Let’s just say – this frosting, alone, could be dessert. Serve it in a pretty bowl, stick a candle in it, pour your coffee, sing your song, and call it a party. This frosting evokes the same level of emotion that this song and this day, evoke for me… they make me want to dance…
And Dom doesn’t know it yet but by the end of his birthday he’ll know every word to “Happy”! And I’ll teach him some of my moves.
Isn’t that great?!
Don’t you think he’ll love it?
Happy Birthday, Dommi!!!!
Here’s to a day of decadence and dancing!
Buon Appetito!
Yellow Butter Cake with Chocolate Frosting
- Category: Dessert
Ingredients
- 2 sticks unsalted butter, room temperature, plus more for pans
- 1 1/2 cups all-purpose flour, plus more for pans
- 1 1/2 cups cake flour (not self-rising)
- 1 Tbsp. baking powder
- 1/2 tsp salt
- 1 3/4 cups sugar
- 4 large eggs
- 2 tsp. pure vanilla extract
- 1 1/4 cups milk
- 1 lb. best-quality semisweet chocolate, chopped
- 6 Tbsp. cocoa powder
- 6 Tbsp. boiling water
- 3 sticks unsalted butter, room temperature
- 1/2 cup confectioners’ sugar
- Pinch of salt
Instructions
- Preheat the oven to 350 degrees.
- Butter two 9 x 2 inch round cake pans; line the bottoms with parchment paper.
- Butter parchment, and dust with flour, tapping out excess; set aside.
- Into a medium bowl, sift together flours, baking powder, and salt; set aside.
- In the bowl of an electric mixer fitted with paddle attachment, beat the butter and sugar until light and fluffy, 3 – 4 minutes, scraping down the sides of bowl as needed.
- Beat in eggs, one at a time, then beat in vanilla.
- With the mixer on low speed, add the flour mixture in three parts, alternating with the milk and beginning and ending with the flour; beat until just combined after each addition.
- Divide the batter between the prepared pans.
- Bake, rotating the pans half-way through, until cakes are golden brown, and a cake tester inserted in the centers comes out clean, about 30 – 35 minutes.
- Transfer pans to a wire rack to cool 20 minutes.
- Invert cakes onto the rack; peel off the parchment.
- Reinvert cakes and let them cool completely, top sides up.
- In the meantime, make frosting.
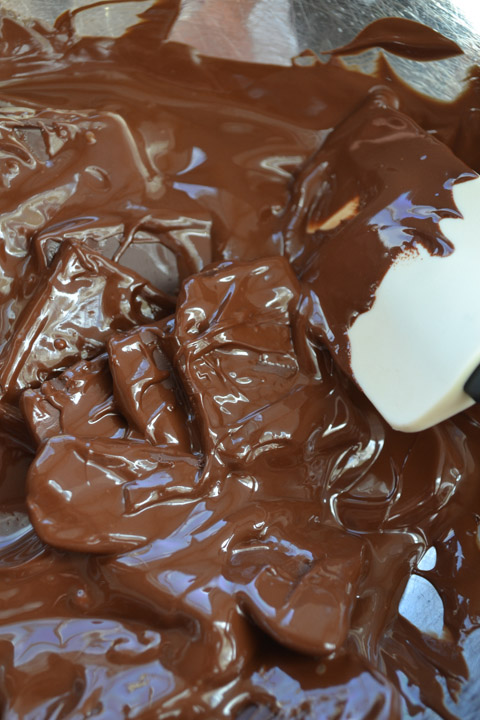
- Place chocolate in a heatproof bowl set over simmering water.
- Stir occasionally, until chocolate is melted, about 15 minutes.
- Set bowl on countertop, and let chocolate cool to room temperature, 25 – 30 minutes.
- Meanwhile combine cocoa powder and boiling water in a small bowl; stir until cocoa is dissolved.
- In the bowl of the electric mixer, beat butter, confectioners’ sugar, and salt on medium-high speed until light and fluffy; 3 – 4 minutes.
- Add melted chocolate; beat on low until combined, 1 – 2 minutes; scraping down sides of bowl as needed.
- Beat in the cocoa mixture.
- Place one cake layer on a cake plate, and spread top with 3/4 cup frosting.
- Place the other cake layer on top.
- Spread the entire cake with remaining frosting, swirling to coat in a decorative fashion.
- Cake can be kept in the refrigerator, covered with a cake dome, for up to three days.
- Let cake sit at room temperature for 20 minutes before serving.
(*Recipe inspired by Martha Stewart.)
“Clap along if you know what happiness is to you!” ~P.W.
Ciao!